There is a specific, primal satisfaction that comes from hearing the aggressive hiss of cold seafood hitting a screaming-hot cast iron skillet. When it comes to pan-seared scallops, that sound is the first indicator of a successful meal, signaling the beginning of the Maillard reaction that creates a thick, golden-brown crust.
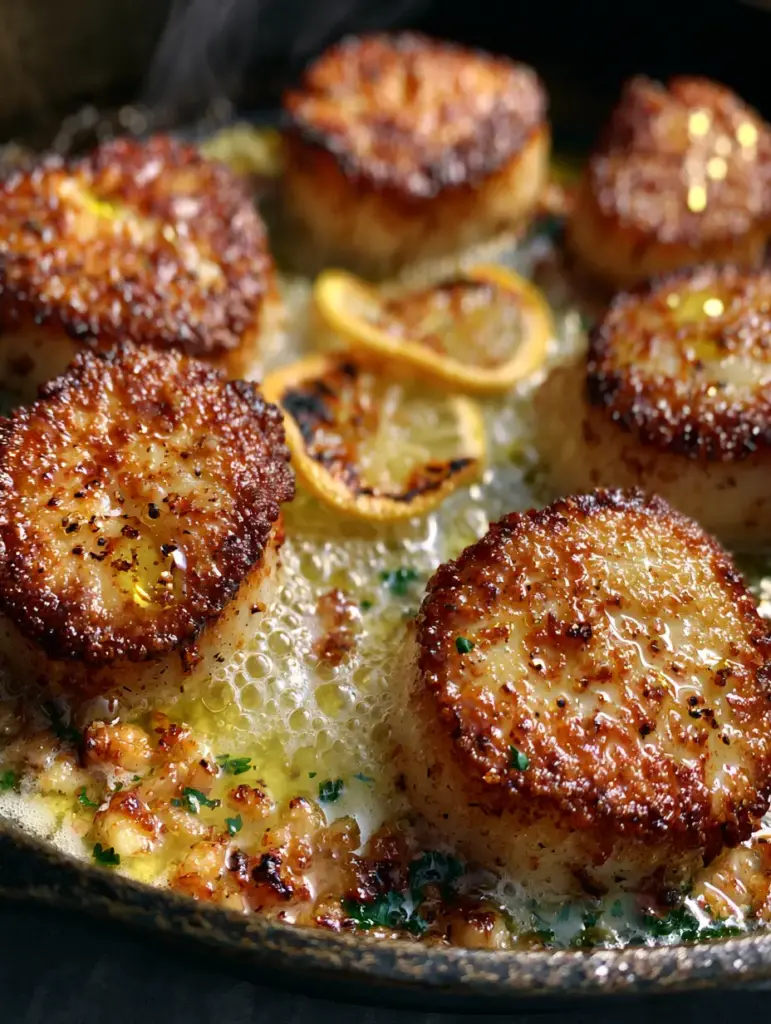
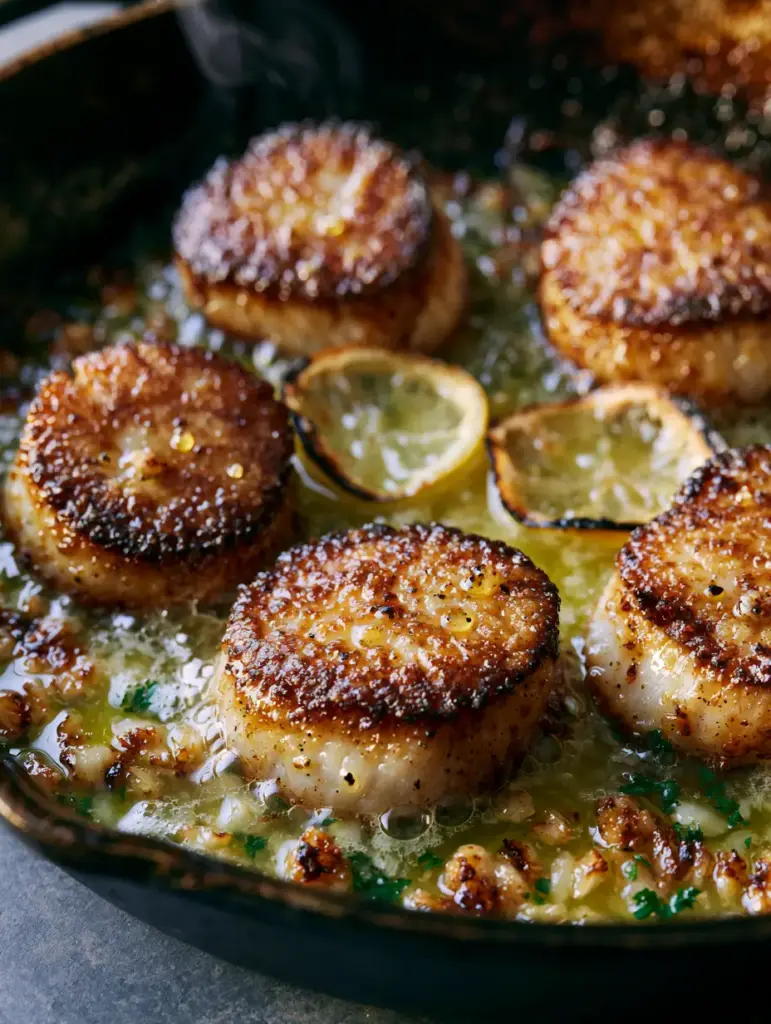
Imagine five jumbo sea scallops, each boasting a uniform, dark golden-brown shatter-crisp exterior that yields to a buttery, tender center. They sit in a shallow, bubbling pool of translucent lemon garlic butter sauce, flecked with toasted bits of minced garlic and bright emerald parsley.
This recipe isn’t just about cooking; it’s about mastering a culinary technique that bridges the gap between home cooking and high-end bistro dining. We are recreating the exact sensory experience of a professional kitchen right on your stovetop, complete with charred lemon slices and that signature glistening finish.
The Anatomy of a Perfect Jumbo Sea Scallop
- The Shatter-Crisp Crust: Achieving a thick, uniform crust requires high heat and perfectly dry protein, creating a texture that literally “shatters” when bitten into.
- The Basting Technique: We use the French “arrosé” method, continuously spooning bubbling garlic butter over the scallops to infuse flavor while keeping the meat succulent.
- The Visual Cues: From the wisp of steam rising from the skillet to the tiny droplets of oil glistening on the seared surface, every detail is designed for maximum appetite appeal.
- Balanced Aromatics: The combination of pungent sautéed garlic, cracked black pepper, and charred lemon creates a sophisticated flavor profile that cuts through the richness of the butter.
The Essential Components of Restaurant-Quality Scallops
Jumbo Sea Scallops: You will need 1 lb (454g) of “dry-packed” jumbo sea scallops. Dry-packed means they haven’t been treated with STP (sodium tripolyphosphate), which prevents them from searing and results in a soapy taste.
High-Smoke Point Oil: 2 tbsp (30ml) of avocado or grapeseed oil is foundational. These oils can withstand the intense heat required to create that dark golden-brown crust without burning or smoking excessively.
Unsalted Butter: 3 tbsp (45g) of high-quality unsalted butter provides the base for our bubbling sauce. Using unsalted butter allows us to control the seasoning precisely and prevents the browned bits of garlic from becoming overly salty.
Fresh Garlic: 4 cloves (approx. 20g) of garlic, finely minced. These bits will toast in the butter, providing a nutty, savory crunch that nestles between the scallops in the pan.
Lemon Accents: One large lemon, half of it sliced into thin half-moons for charring and the other half reserved for a fresh squeeze of juice. The charred lemons provide a deep, caramelized acidity that fresh juice alone cannot replicate.
Fresh Parsley: 2 tbsp (8g) of finely chopped flat-leaf parsley. These tiny emerald-green flecks provide the necessary color contrast against the golden butter and scallops.
Seasoning: 1 tsp (6g) of Kosher salt and ½ tsp (3g) of freshly cracked black pepper. The pepper should be coarse enough to be visible as a dusting on the seared surface of the scallops.
The Foundational Tools for a Professional Sear
To achieve the results seen in the visual blueprint, a rustic cast iron skillet is non-negotiable. Cast iron has a high volumetric heat capacity, meaning once it gets hot, it stays hot, even when cold scallops are added.
You will also need a fish spatula or thin metal turner. Scallops are delicate, and a thick plastic spatula can tear the crust before it has fully released from the pan’s surface.
Finally, a heavy-bottomed spoon is required for basting. This allows you to scoop the bubbling, translucent yellow garlic butter and pour it over the scallops with precision.
The Science of the Sear: Crafting the Ultimate Golden Crust
Phase 1: The Critical Drying Process
The biggest enemy of a pan-seared scallop is moisture. If there is water on the surface of the scallop, it will create a layer of steam, preventing the temperature from rising above 212°F (100°C).
To achieve the Maillard reaction, we need the surface to hit 300°F (150°C). Pat the scallops dry with paper towels, let them sit in the fridge uncovered for 15 minutes, and then pat them dry again right before seasoning.
Phase 2: Achieving the Perfect Skillet Temperature
Place your cast iron skillet over medium-high heat and add the oil. You are looking for the oil to shimmer and just begin to send up a faint wisp of steam.
This intense heat is what creates that “shatter-crisp” crust. Carefully place the scallops in the pan, ensuring they aren’t touching; crowding the pan will drop the temperature and lead to steaming rather than searing.
Phase 3: The Flip and the Butter Baste
Once you see a dark golden-brown ring forming at the base of the scallops (about 2-3 minutes), use your spatula to flip them. They should release easily; if they stick, they aren’t done forming their crust yet.
Immediately drop the butter, minced garlic, and lemon half-moons into the empty spaces of the skillet. As the butter melts and begins to bubble, tilt the pan slightly and begin basting the scallops with the garlic-infused fat.
Phase 4: Finishing with Aromatics
In the final 60 seconds of cooking, sprinkle the emerald-green parsley and cracked black pepper over the pan. The parsley should wilt slightly into the bubbling yellow sauce but retain its vibrant color.
Remove the pan from the heat. The scallops should have a glistening, oiled surface and be surrounded by those characteristic browned bits of garlic and charred lemon slices.
Expert Tips for Scallop Success
- Don’t Season Too Early: Salt draws out moisture. If you salt your scallops 10 minutes before cooking, they will be sitting in a puddle of water, ruining your sear. Season immediately before they hit the oil.
- Watch the Garlic: Garlic burns quickly. Add it only after the scallops have been flipped to ensure it toasts to a golden brown rather than turning bitter and black.
- The “Feel” Test: A perfectly cooked scallop should feel like a marshmallow when pressed—springy and firm on the outside but with a slight give in the center.
- Cold Butter Finishing: If your sauce looks like it’s breaking, add a small cube of cold butter at the very end and whisk it with the spoon to emulsify the lemon juice and fat.
Strategic Pairings for an Elegant Seafood Spread
When serving these scallops, you want side dishes that complement the rich butter sauce without overpowering the delicate sweetness of the seafood. For a classic pairing, serve these over a bed of creamy potatoes dauphinoise to soak up the garlic butter.
If you’re building a larger seafood menu, these scallops are a natural precursor to a light seared cod recipe or a platter of Shrimp Oreganata. The citrus notes in the scallops also pair beautifully with a light vegetable side like Greek zucchini fritters.
For those looking for more easy seafood recipes, this basting technique can also be applied to other firm white fish, making it a versatile skill to have in your culinary arsenal.
Managing Leftovers and Reheating
Scallops are best enjoyed immediately, as the crust loses its “shatter” texture as it cools. However, if you have leftovers, store them in an airtight container in the refrigerator for up to 2 days.
To reheat, avoid the microwave, which will turn the scallops rubbery. Instead, flash-sear them in a hot skillet with a teaspoon of butter for 30 seconds per side, just enough to warm them through without overcooking the center.
We do not recommend freezing cooked scallops, as the delicate cellular structure of the meat will break down, resulting in a mushy texture upon thawing.
Common Questions About Pan-Searing Scallops
While possible, a non-stick pan cannot hold or distribute heat as effectively as cast iron or stainless steel. For a truly ‘shatter-crisp’ crust, heavy-bottomed pans are highly recommended.
Yes, the small, rectangular ‘foot’ or side muscle can be tough and chewy. Simply pinch it and pull it away from the main body of the scallop before drying and seasoning.
The oil should be shimmering and just beginning to reach its smoke point (a tiny wisp of steam). If you drop a tiny corner of a scallop in and it doesn’t sizzle aggressively, the pan isn’t ready.
Wet scallops are treated with a phosphate solution that causes them to absorb water, which leaches out during cooking and prevents a good sear. Dry scallops are natural and untreated, allowing for a superior golden-brown crust.
Rubbery scallops are usually the result of overcooking. Scallops only need about 2-3 minutes on the first side and 1-2 minutes on the second side. They should be removed from the heat when the center is still slightly opaque.
The Ultimate Pan-Seared Scallops Recipe
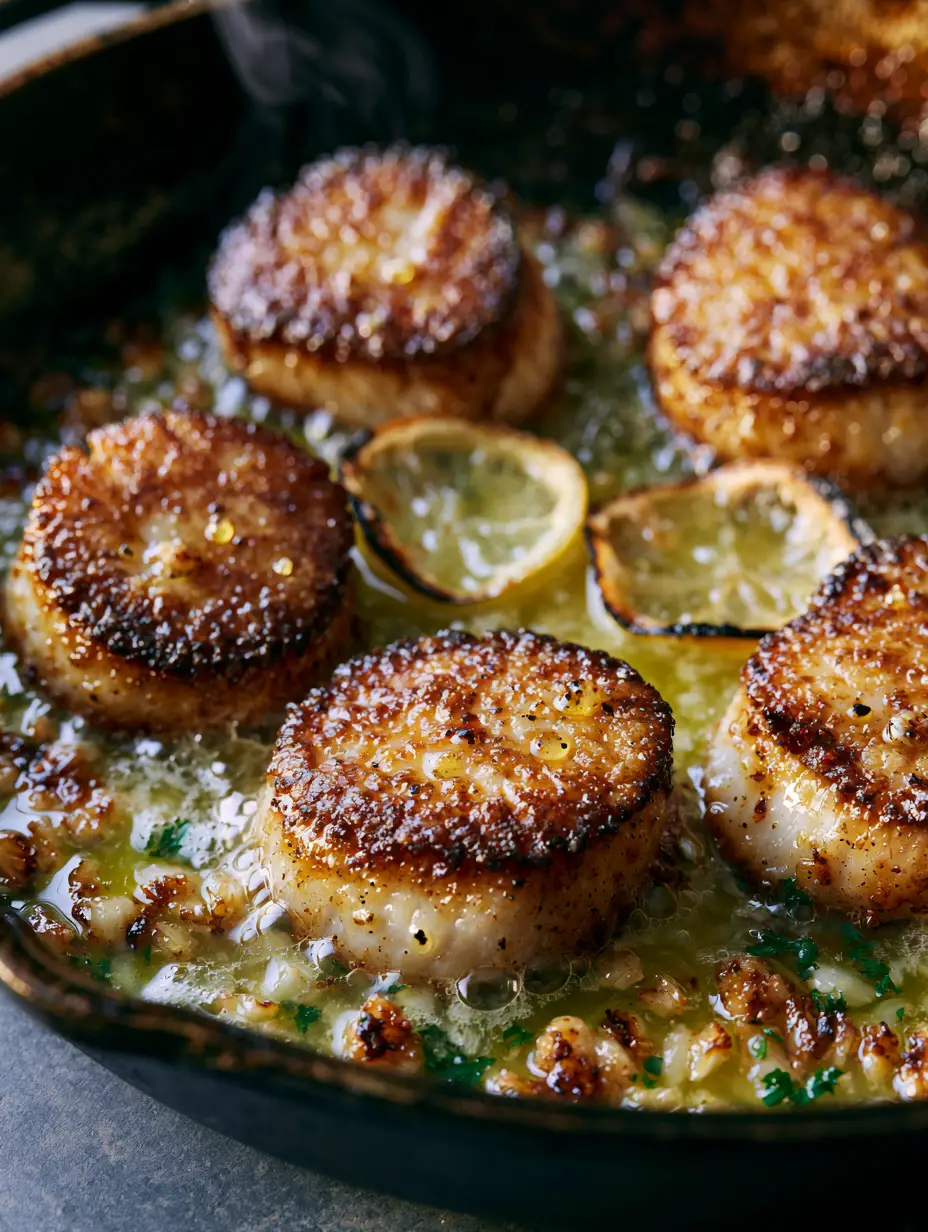
Pan-Seared Scallops with Lemon Garlic Butter and a Shatter-Crisp Crust
Ingredients
Equipment
Method
- Pat the jumbo sea scallops thoroughly dry with paper towels. For the best crust, let them sit uncovered in the fridge for 15 minutes before patting dry again.
- Just before cooking, season both sides of the scallops with Kosher salt and cracked black pepper.
- Heat avocado oil in a cast iron skillet over medium-high heat until shimmering and a faint wisp of steam rises.
- Place scallops in the pan, leaving space between them. Sear for 2-3 minutes without moving them until a thick, dark golden-brown crust forms.
- Flip the scallops. They should release easily from the pan.
- Add the butter, minced garlic, and lemon slices to the skillet. Once the butter is bubbling and translucent yellow, tilt the pan.
- Spoon the bubbling garlic butter repeatedly over the scallops for 1-2 minutes. Add chopped parsley in the final 30 seconds.
- Remove from heat immediately. Garnish with the charred lemon moons and extra pan sauce.
Notes
Ensure the skillet is screaming hot before adding the scallops to guarantee a shatter-crisp crust.
Join Our Culinary Community
Mastering the art of pan-seared scallops is a milestone for any home cook. We would love to see your results! Did you get that deep, golden-brown crust? Did the charred lemons add that perfect hit of acidity?
Leave a comment below and share your experience. If you found this guide helpful, please share it on Pinterest so other seafood lovers can find us. Don’t forget to sign up for our newsletter for more deep dives into professional cooking techniques!