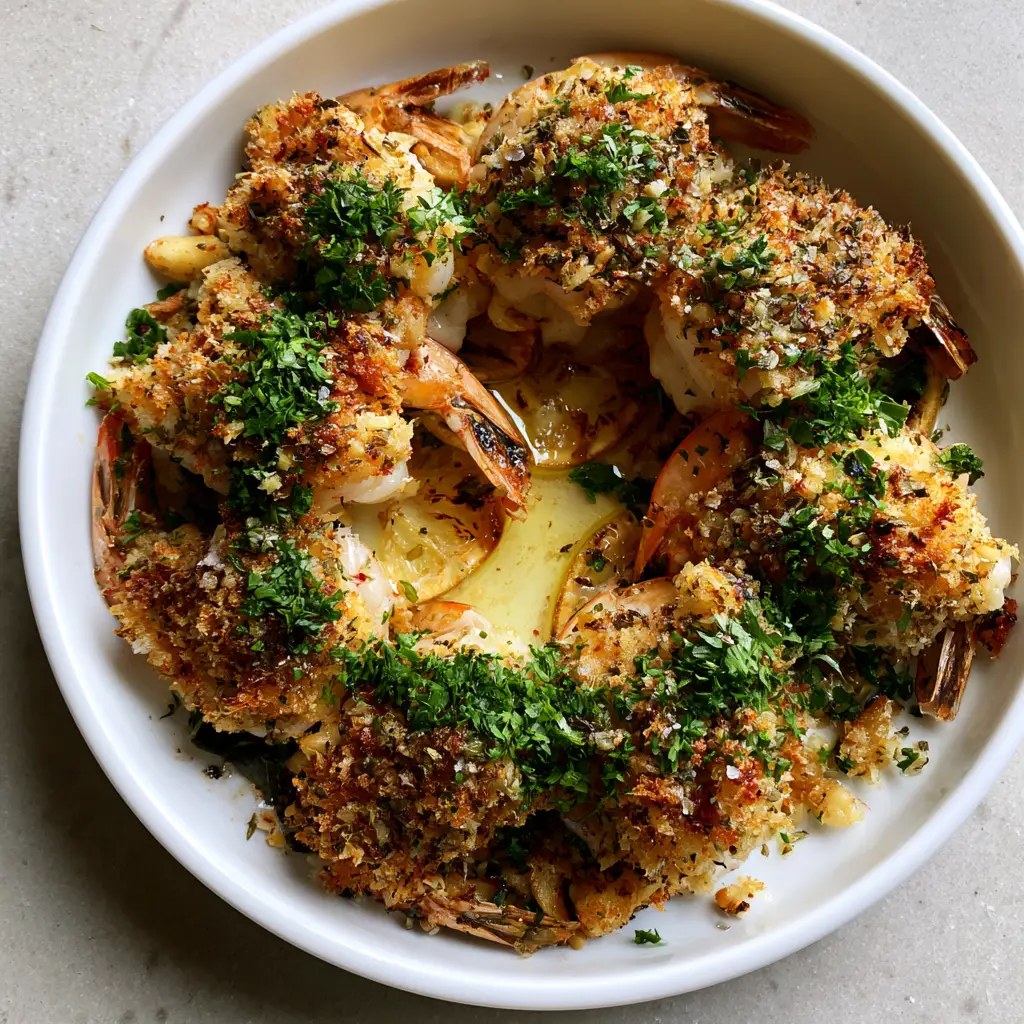
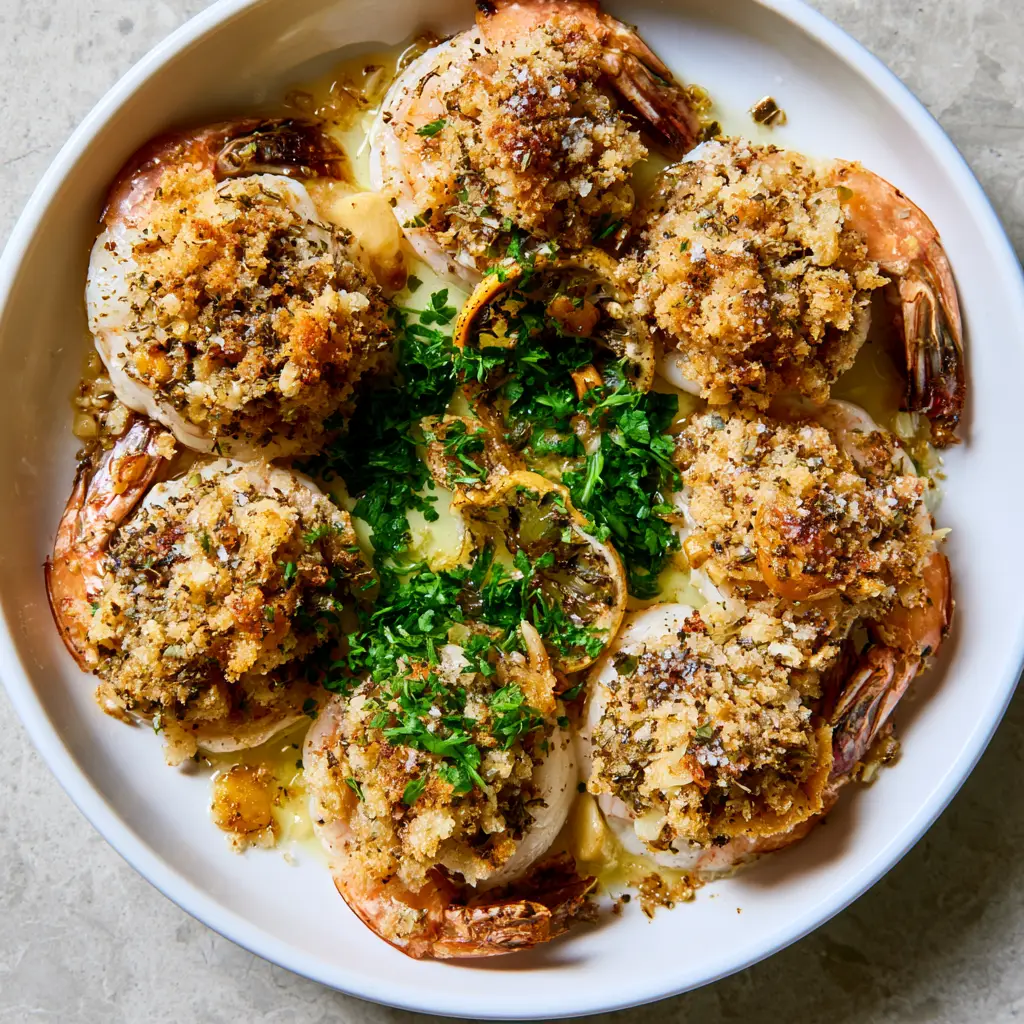
There is a specific visual magic that happens when a tray of Shrimp Oreganata hits the table. Imagine jumbo, succulent shrimp arranged in a perfect, nested circle, each one topped with a mountain of jagged, golden-brown panko that shatters with every bite. The aroma of toasted garlic and dried oregano fills the room, promising a flavor profile that is both nostalgic and sophisticated.
This recipe isn’t just about throwing breadcrumbs on seafood; it’s about a meticulous layering of textures. By focusing on a “visual-first” culinary approach, we ensure that every shrimp looks like it belongs on the cover of a high-end food magazine, specifically mimicking that sought-after smartphone aesthetic with sharp focus and natural morning light clarity.
Whether you are looking for a centerpiece for your holiday spread or a quick weeknight indulgence, this version of Shrimp Oreganata delivers on every sensory promise. From the heavy dusting of bright green parsley to the thin, charred lemon wheels tucked between each tail, this is seafood at its most artful and delicious.
Why This Crispy Golden Shrimp Perfection Works
- The “Jagged” Texture: By using panko instead of traditional fine breadcrumbs, we achieve a thick, crunchy layer that stands tall on the shrimp without becoming a soggy paste.
- Clarified Butter Glisten: Using clarified garlic butter provides a high smoke point for browning and a beautiful, soft glisten that highlights the pink curve of the shrimp meat.
- Aromatic Depth: The combination of pre-roasted garlic and dried oregano creates a savory foundation that smells like a professional Italian kitchen.
- Charred Citrus Balance: Searing the lemon slices before plating adds a smoky acidity that cuts through the rich, buttery topping perfectly.
- High-Impact Plating: Arranging the shrimp in a white ceramic dish creates a high-contrast visual that makes the golden-brown tones of the breading pop.
Essential Components for the Perfect Seafood Crust
Jumbo Shrimp (Tails-On): You’ll need 1.5 lbs (680g) of jumbo shrimp, peeled and deveined. Leaving the tails on provides a structural “handle” for the breading and adds a professional aesthetic to the final plating.
Panko Breadcrumbs: 1.5 cups (90g) of Japanese-style panko. These are the key to that “jagged” look; they stay light and airy, providing a much louder crunch than standard crumbs.
Roasted Garlic: 6-8 cloves of roasted garlic, finely minced. Roasting the garlic first removes the harsh “bite” and replaces it with a mellow, buttery sweetness that permeates the breading.
Dried Oregano: 1 tbsp (3g) of high-quality dried oregano. This is the namesake of the dish, providing that earthy, herbal backbone that defines “Oreganata” style.
Clarified Garlic Butter: 6 tbsp (85g) of unsalted butter, clarified and infused with a hint of garlic. Clarifying the butter removes milk solids, preventing the topping from burning while it develops a golden hue.
Fresh Flat-Leaf Parsley: 1/2 cup (30g) of finely chopped bright green parsley. This garnish isn’t just for color; it adds a refreshing, grassy finish to the rich seafood.
Charred Lemon Wheels: 2 small lemons, sliced thin. Charring them in a dry pan caramelizes the sugars and intensifies the juice for a superior flavor profile.
Sea Salt Flakes and Red Pepper Flakes: A generous pinch of each. The flakes provide a localized burst of seasoning and a subtle heat that wakes up the palate.
The Chef’s Toolkit: Equipment for Success
To achieve the specific visual results of this Shrimp Oreganata, you will need a 10-inch (25cm) shallow white ceramic baking dish. The white ceramic acts as a neutral canvas, making the colors of the shrimp and parsley more vibrant.
A heavy-bottomed skillet is essential for pre-toasting the panko. This ensures the crumbs are golden before they even touch the shrimp, preventing overcooked, rubbery seafood. You will also want a sharp chef’s knife for that “finely chopped” parsley appearance and a handheld citrus juicer to finish the dish.
Step-by-Step: Crafting the Perfect Shrimp Oreganata
Preparing the Golden Panko Base
In a medium skillet over medium-low heat, melt 2 tbsp (28g) of your clarified garlic butter. Add the 1.5 cups (90g) of panko and stir constantly until they reach a light blonde color. This pre-toasting step is the secret to a crunchy, non-oily topping that doesn’t soak into the shrimp meat.
Once toasted, move the crumbs to a bowl and fold in the minced roasted garlic, dried oregano, sea salt flakes, and a pinch of red pepper flakes. The crumbs should look jagged and uneven, with visible flecks of green and white throughout.
Arranging the Shrimp for Maximum Visual Impact
Pat your jumbo shrimp completely dry with paper towels; moisture is the enemy of a crispy topping. Lightly grease your white ceramic dish with a drop of oil. Arrange the shrimp in a neat, tight circle with the tails pointing upward and toward the center.
This circular arrangement ensures even heat distribution and creates a beautiful presentation that mimics the “high-angle smartphone photo” look. Ensure the shrimp are touching but not overlapping significantly.
Applying the Topping and Baking
Preheat your oven to 425°F (220°C). Using a spoon, mound a thick layer of the panko mixture onto the meaty part of each shrimp. Do not press down too hard; you want the topping to look “jagged” and architectural, not flat.
Drizzle the remaining clarified garlic butter over the tops of the breadcrumbs. The butter should create a soft glisten on the shrimp meat without fully soaking the topping, maintaining that contrast between succulent meat and crunchy crust.
The Final Char and Garnish
Bake for 8-10 minutes, or until the shrimp are opaque and pink. While the shrimp bake, sear your lemon wheels in a hot, dry skillet until they develop dark brown char marks. Tuck these charred wheels between the shrimp immediately after they come out of the oven.
Finish with a heavy dusting of finely chopped flat-leaf parsley and a final sprinkle of sea salt flakes. The bright green of the parsley against the golden panko provides the “ultra-sharp focus” on texture that makes this dish a showstopper.
Expert Tips for Topping Mastery
- Avoid the “Soggy Bottom”: Never put raw garlic into the breading; the moisture will steam the panko. Always use roasted or pre-sauteed garlic for the best crunch.
- Size Matters: Use “U-12” or “U-15” shrimp. Smaller shrimp will overcook before the breading has a chance to fully crisp up in the oven.
- The Temperature Trick: If your breading isn’t brown enough but the shrimp are done, pop the dish under the broiler for exactly 45 seconds. Watch it like a hawk to avoid burning.
- Infuse Your Butter: Simmer your clarified butter with a sprig of oregano for 2 minutes before drizzling to double down on the aromatic profile.
Storage, Reheating, and Make-Ahead Advice
Shrimp Oreganata is best served immediately to preserve the “jagged” crunch of the panko. However, if you have leftovers, store them in an airtight container in the refrigerator for up to 2 days. To reheat, avoid the microwave at all costs as it will turn the shrimp rubbery and the topping mushy.
Instead, place the shrimp in a toaster oven or air fryer at 350°F (175°C) for 3-5 minutes. This helps re-crisp the breadcrumbs. This dish does not freeze well, as the delicate texture of the shrimp and the crunch of the panko are compromised during the thawing process.
What to Serve With Your Italian Seafood Feast
To keep the meal light and vibrant, I highly recommend serving this alongside a bright lemon feta orzo shrimp salad or a side of Greek zucchini fritters for added texture. If you want a more traditional Italian-American experience, this dish pairs beautifully with a bowl of caramelized onion pasta.
For those looking for a lower-carb option, a stuffed zucchini recipe works wonderfully as a companion dish. This Shrimp Oreganata also fits perfectly into a larger spread of easy seafood recipes for a summer dinner party or a holiday gathering.
Frequently Asked Questions
Yes, but they must be completely thawed and patted extremely dry. Any excess moisture will steam the panko topping and make it soggy instead of crispy.
You can, but the texture will be significantly different. Regular breadcrumbs create a finer, denser coating, while panko provides the ‘jagged’ and airy crunch that defines this specific visual style.
Clarified butter is recommended because it has a higher smoke point and won’t burn at high temperatures. It also provides a cleaner ‘glisten’ on the shrimp without the white milk solids showing.
The key is high heat for a short time. Baking at 425°F (220°C) ensures the topping browns and the shrimp cooks through in under 10 minutes, keeping the meat succulent.
Yes. Since shrimp cook so quickly, the panko won’t have enough time to reach that deep golden-brown color in the oven without overcooking the seafood. Pre-toasting is essential for the visual and textural result.
The Ultimate Shrimp Oreganata Recipe
Shrimp Oreganata: The Ultimate Crispy Italian-American Seafood Classic
Ingredients
Equipment
Method
- In a skillet over medium-low heat, melt 2 tbsp of clarified butter. Stir in panko until golden blonde and jagged. Remove from heat.
- Combine toasted panko with minced roasted garlic, dried oregano, sea salt, and red pepper flakes in a small bowl.
- Pat shrimp dry and arrange in a neat circle in a white ceramic dish, tails pointing up.
- Mound the panko mixture thickly over each shrimp. Drizzle with the remaining clarified butter to create a glisten.
- Bake at 425°F (220°C) for 8-10 minutes until shrimp are pink and meat is opaque.
- While shrimp bake, sear lemon slices in a dry hot pan until charred. Tuck between baked shrimp.
- Dust heavily with fresh parsley and extra sea salt flakes before serving.
Notes
Use U-12 jumbo shrimp for the best ratio of meat to crunchy topping.
Conclusion and Join the Community
Mastering the Shrimp Oreganata is a rite of passage for any home cook who loves Italian flavors. By focusing on the visual cues—the charred lemons, the jagged panko, and the clarified butter glisten—you create a dish that is as much a feast for the eyes as it is for the stomach. This recipe proves that simple ingredients, when treated with professional technique, can result in something truly extraordinary.
If you loved this recipe, please leave a comment below and let me know how your golden crust turned out! Don’t forget to follow me on Pinterest for more culinary inspiration and high-angle food photography tips. Tag your creations with #KatiePlates so I can see your beautiful work!