There is a specific, mouth-watering magic that happens when high heat meets a sugar-rich glaze. We have all craved that iconic takeout experience: bite-sized pieces of chicken dripping in a sauce so thick and glossy it looks like liquid amber. Finding a truly authentic Gluten Free Teriyaki Chicken that delivers on that “sticky-finger” promise without the hidden wheat can be a challenge—until now.
This recipe isn’t just a gluten-free alternative; it is a culinary upgrade. By utilizing a dark rimmed sheet pan and high-intensity roasting, we achieve those coveted caramelized edges on the chicken and perfectly blistered red bell peppers. Every morsel is encased in a translucent, bubbling glaze that clings to the meat, reflecting the light with a professional-grade sheen that looks exactly like your favorite high-end bistro dish.
Whether you are a seasoned celiac or simply looking for a cleaner way to enjoy classic Chinese takeout flavors, this sheet pan method ensures you get the texture of a wok sear with the ease of oven roasting. Let’s dive into the science of the perfect gluten-free glaze and the secrets to tender-crisp vegetables.
Why This Sheet Pan Teriyaki Recipe is a Game Changer
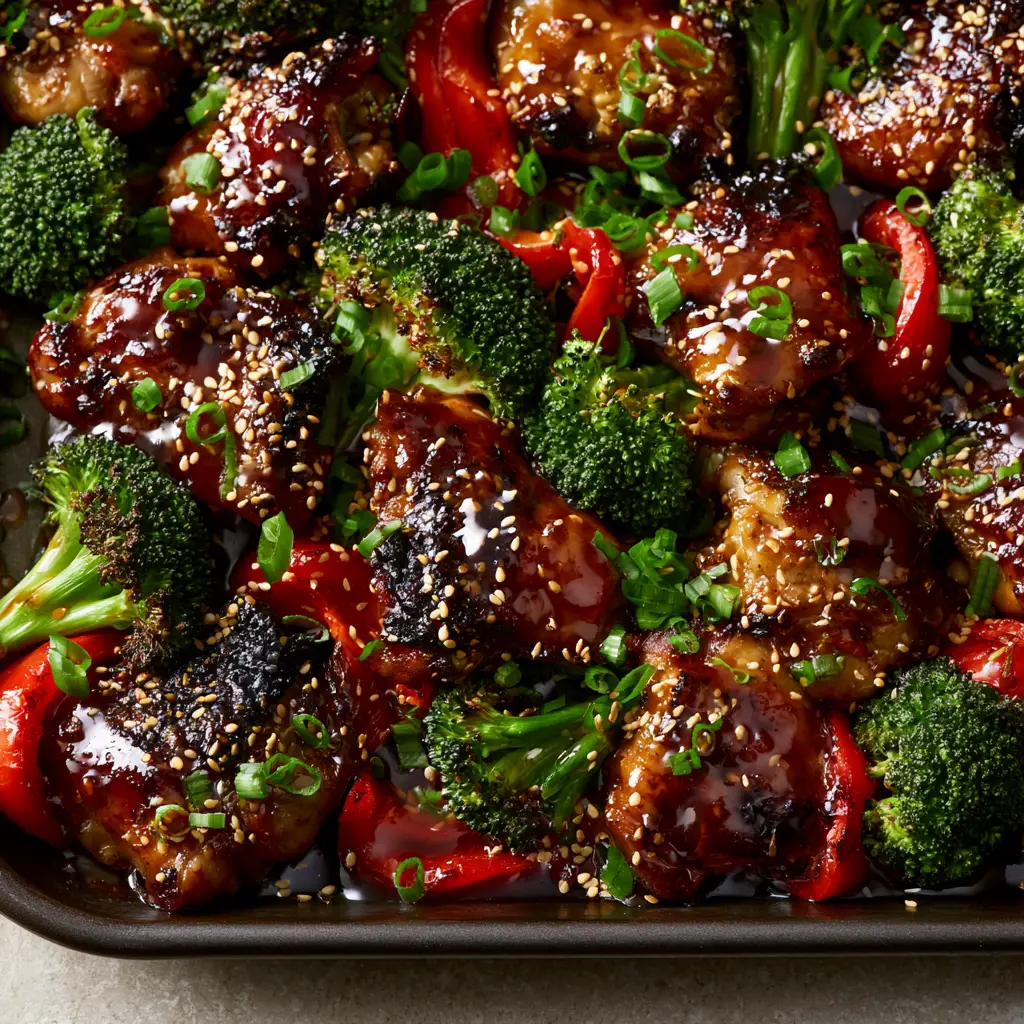
- The Maillard Reaction: We use boneless, skinless chicken thighs because their higher fat content allows for deep charring and caramelized edges without drying out the meat.
- Forensic Sauce Texture: Our custom starch slurry creates a thick, translucent amber glaze that is highly reflective and clings to every crevice of the chicken.
- High-Heat Blistering: By roasting at 425°F (220°C), the red bell peppers develop beautiful blister marks while the broccoli remains vibrant green and tender-crisp.
- One-Pan Simplicity: This entire meal, from the seared protein to the garnished finish, happens on a single dark metal sheet pan for maximum flavor concentration and minimal cleanup.
The Anatomy of a Flawless Gluten Free Teriyaki Chicken Glaze
Traditional teriyaki sauce relies on soy sauce, which is brewed with wheat. To make this Gluten Free Teriyaki Chicken, we swap standard soy for high-quality Tamari or coconut aminos. Tamari provides a deeper, richer umami profile that actually enhances the “amber” color we are looking for in the final bake.
1.5 lbs (680g) Chicken Thighs: Trimmed and cut into 1-inch (2.5cm) bite-sized chunks. Thighs are essential for that “wet shine” and succulent mouthfeel shown in the visual blueprint.
1/2 cup (120ml) Tamari: Ensure your bottle is certified gluten-free. This provides the salt and the dark pigment for our translucent sauce.
1/4 cup (50g) Light Brown Sugar & 2 tbsp (30ml) Honey: The combination of these two sugars creates the “bubbling” effect and the “sticky” texture. Honey adds the reflective gloss, while brown sugar provides the deep caramel notes.
1 tbsp (15g) Freshly Grated Ginger & 3 Cloves Garlic: These aromatic “invisible” ingredients infuse the oil and the sauce with a punchy, authentic fragrance that fills the kitchen as the chicken sears.
2 tsp (10ml) Toasted Sesame Oil: This is a foundational fat. It has a high smoke point and provides the base for the “wet” look of the finished dish.
1 tbsp (8g) Cornstarch + 2 tbsp (30ml) Cold Water: This slurry is the secret to the thick, translucent finish. Without it, the sauce would be thin and watery rather than a “thick amber glaze.”
Essential Equipment for Roasted Excellence
To achieve the specific visual result of charred edges and blistered peppers, your choice of pan matters. A dark metal sheet pan is superior to a light aluminum one here; the dark surface absorbs more radiant heat, which leads to better browning on the bottom of the chicken pieces.
You will also need a small saucepan to pre-thicken the glaze. While some “dump and bake” recipes exist, pre-simmering the sauce ensures that the sugars are fully dissolved and the cornstarch is activated, resulting in that “highly reflective” look the moment it hits the oven.
Step-by-Step: Capturing the Sticky, Charred Visuals
Preparing the Thick Amber Glaze
In a small saucepan over medium heat, whisk together the tamari, brown sugar, honey, grated ginger, and minced garlic. Bring the mixture to a gentle simmer until the sugar has completely dissolved and the aroma of ginger is pungent.
Whisk your cornstarch and cold water into a smooth slurry. Slowly pour the slurry into the simmering sauce, whisking constantly. Within 1-2 minutes, the sauce will transform from a thin liquid into a thick, translucent, and glossy amber syrup. Remove from heat immediately.
Searing the Chicken and Blistering the Veggies
Preheat your oven to 425°F (220°C). Place your chicken thigh chunks on the dark metal sheet pan. Toss them with 1 tbsp (15ml) of neutral oil and a pinch of salt. Ensure they are spread out in a single layer with space between them; crowding the pan will cause them to steam rather than sear.
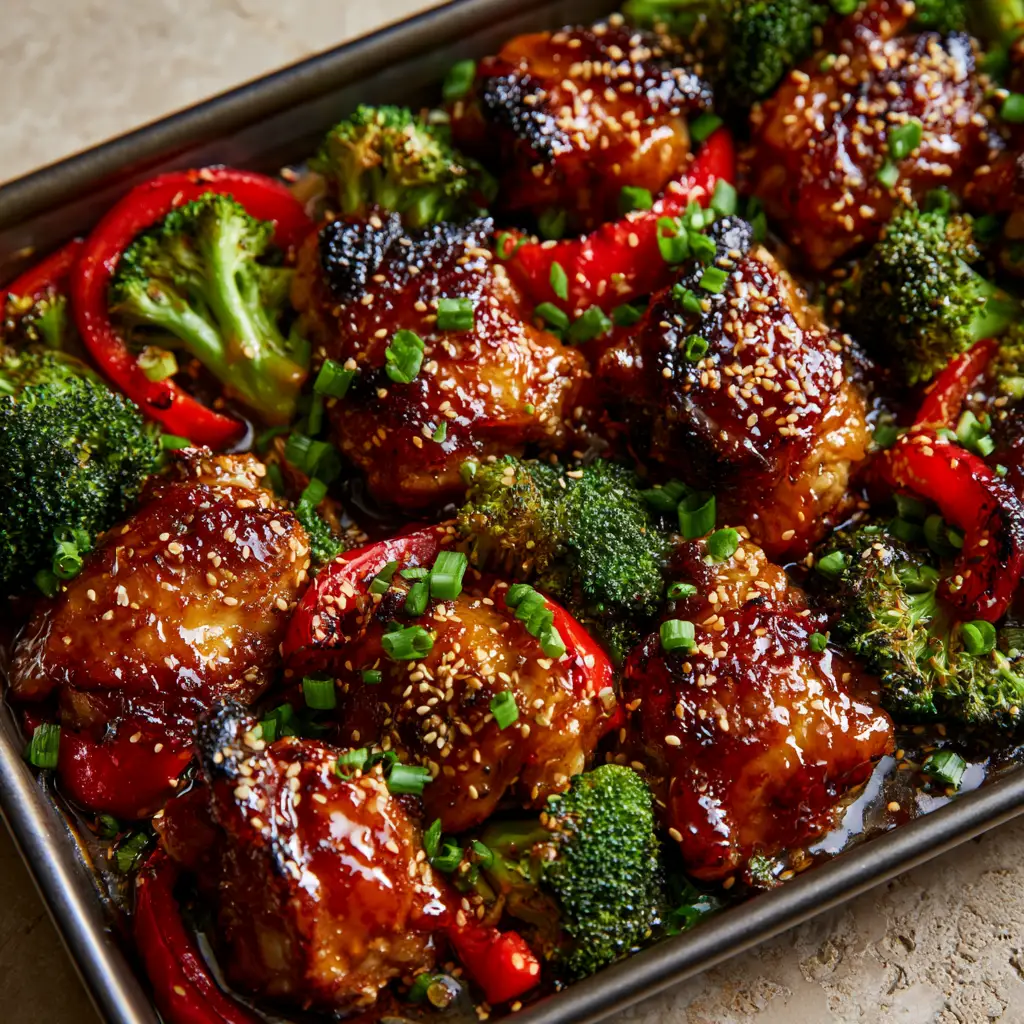
Add your 2 cups (150g) of broccoli florets and 1 large red bell pepper, sliced into strips. Roast for 12-15 minutes. Watch for the visual cues: the chicken should have visible charred, caramelized edges, and the red pepper strips should show slight black blister marks.
The Final Glaze and Garnish
Pull the pan from the oven. Pour the prepared teriyaki glaze over the chicken and vegetables. Use a spatula to toss everything until the chicken is “heavily coated.” Return the pan to the oven for 3-5 minutes. This is when the sauce begins “bubbling” and becomes “highly reflective.”
Immediately after removing the pan for the final time, garnish with 1 tbsp (9g) of toasted white sesame seeds and 1/4 cup (25g) of finely chopped bright green scallions. The residual heat will slightly soften the scallions, releasing their fresh scent without losing their vibrant green color.
Expert Tips for the Ultimate Seared Texture
- Pat the Chicken Dry: Before cutting the thighs, use a paper towel to remove surface moisture. This ensures the oil can immediately begin the searing process for those crispy edges.
- The “Sizzling” Pan: For even better results, preheat the sheet pan in the oven for 5 minutes before adding the chicken. You should hear a distinct sizzle the moment the meat touches the metal.
- Avoid the “Soggy Broccoli” Trap: Cut your broccoli into uniform, medium-sized florets. If they are too small, they will turn to mush before the chicken chars. We want them “tender-crisp” as described in the blueprint.
- Substitute with Care: If you use coconut aminos instead of Tamari, reduce the added sugar by 1 tbsp (12g), as coconut aminos are naturally sweeter.
What to Serve with Your Gluten Free Teriyaki Chicken
This dish is a complete meal on its own, but to soak up that extra bubbling sauce, it is best served over a bed of fluffy jasmine rice or cauliflower rice. For a thematic spread, you might also enjoy exploring Hawaiian-style teriyaki flavors or pairing it with a light avocado salad for a fresh contrast.
If you love the convenience of this method, check out our other easy chicken and vegetable recipes or try a different flavor profile with our Hawaiian chicken sheet pan dinner. The beauty of the dark sheet pan method is its versatility across various cuisines.
Frequently Asked Questions
Absolutely! Replace the Tamari with coconut aminos. Just keep in mind that coconut aminos are sweeter, so you may want to reduce the brown sugar slightly.
Yes, but be careful not to overcook them. Thighs are preferred because their fat content helps achieve the charred, caramelized edges without the meat becoming dry.
The secret is the cornstarch slurry and the inclusion of honey. Honey provides a reflective, ‘wet’ shine, while the cornstarch creates a thick, translucent body that clings to the chicken.
No. Traditional teriyaki sauce is made with soy sauce which contains wheat. You must use Tamari or coconut aminos and a gluten-free starch like cornstarch to keep it safe.
Dark pans absorb more heat than light ones, which helps the chicken develop those beautiful charred edges and allows the vegetables to blister more effectively.
The Perfect Gluten Free Teriyaki Chicken Recipe
Ready to create a restaurant-quality meal in your own kitchen? This Gluten Free Teriyaki Chicken combines the ease of a sheet pan with the sophisticated textures of a high-heat sear. Follow the measurements below for a sticky, glossy, and charred result every single time.
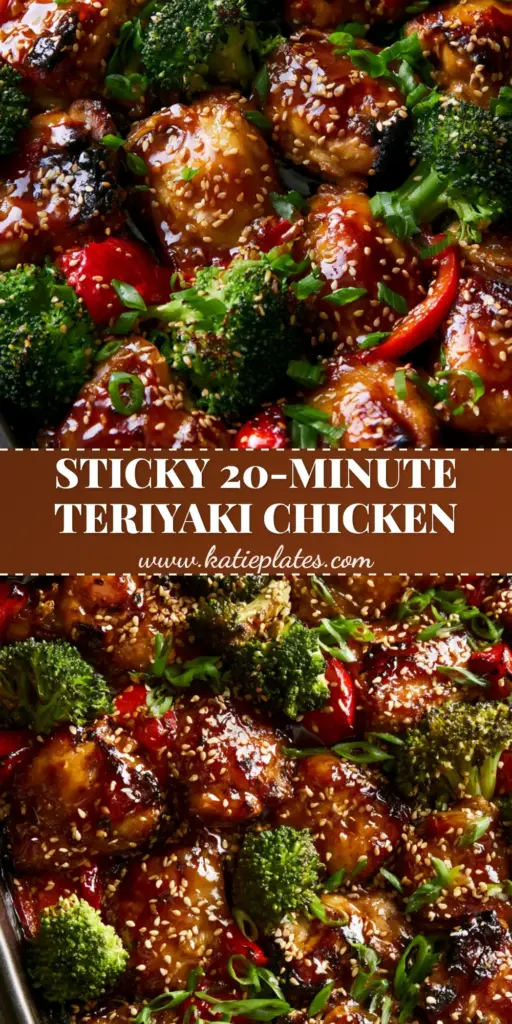
Gluten Free Teriyaki Chicken: The Ultimate Sheet Pan Guide to Sticky, Charred Perfection
Ingredients
Equipment
Method
- In a small saucepan, combine tamari, brown sugar, honey, ginger, and garlic over medium heat until simmering.
- Whisk cornstarch with water to form a slurry, then stir into the saucepan until the sauce becomes a thick, translucent amber glaze.
- Toss chicken, broccoli, and peppers with sesame oil on a dark metal sheet pan. Roast at 425°F (220°C) for 15 minutes until chicken has charred edges and peppers are blistered.
- Pour the glaze over the pan contents, toss to coat heavily, and bake for 3-5 more minutes until the sauce is bubbling and reflective.
Notes
Don't skip the cornstarch slurry; it's the key to the 'wet shine' look.
Closing & Call to Action
Making a restaurant-quality Gluten Free Teriyaki Chicken at home is all about mastering the glaze and respecting the heat of your oven. This dish proves that being gluten-free never means sacrificing that iconic, sticky-sweet texture we all love. The combination of charred chicken thighs and blistered peppers creates a depth of flavor that a standard stir-fry simply cannot match.
Did those caramelized edges turn out perfectly for you? We would love to hear about it! Leave a comment below and let us know how your family enjoyed this sheet pan wonder. Don’t forget to save this recipe to your “Easy Dinners” board on Pinterest so you always have it on hand!