This red snapper recipe is the ultimate marriage of high-end restaurant quality and home-cooked comfort. If you have been searching for a way to achieve that elusive, potato-chip-crisp skin while keeping the white meat underneath incredibly succulent and juicy, you are in the right place. There is something truly magical about the way the flaky white fish meat yields to a fork, especially when it is bathed in a glossy garlic butter sauce.
When you prepare red snapper this way, you aren’t just making dinner; you are creating a sensory experience. From the audible sizzle as the fillets hit the hot stainless steel pan to the aromatic bloom of minced sautéed garlic and fresh parsley, this dish hits every high note. We are focusing on high-quality ingredients and precise temperatures to ensure your results look exactly like a professional food blog photograph.
Why This Pan-Seared Fillet is a Total Showstopper
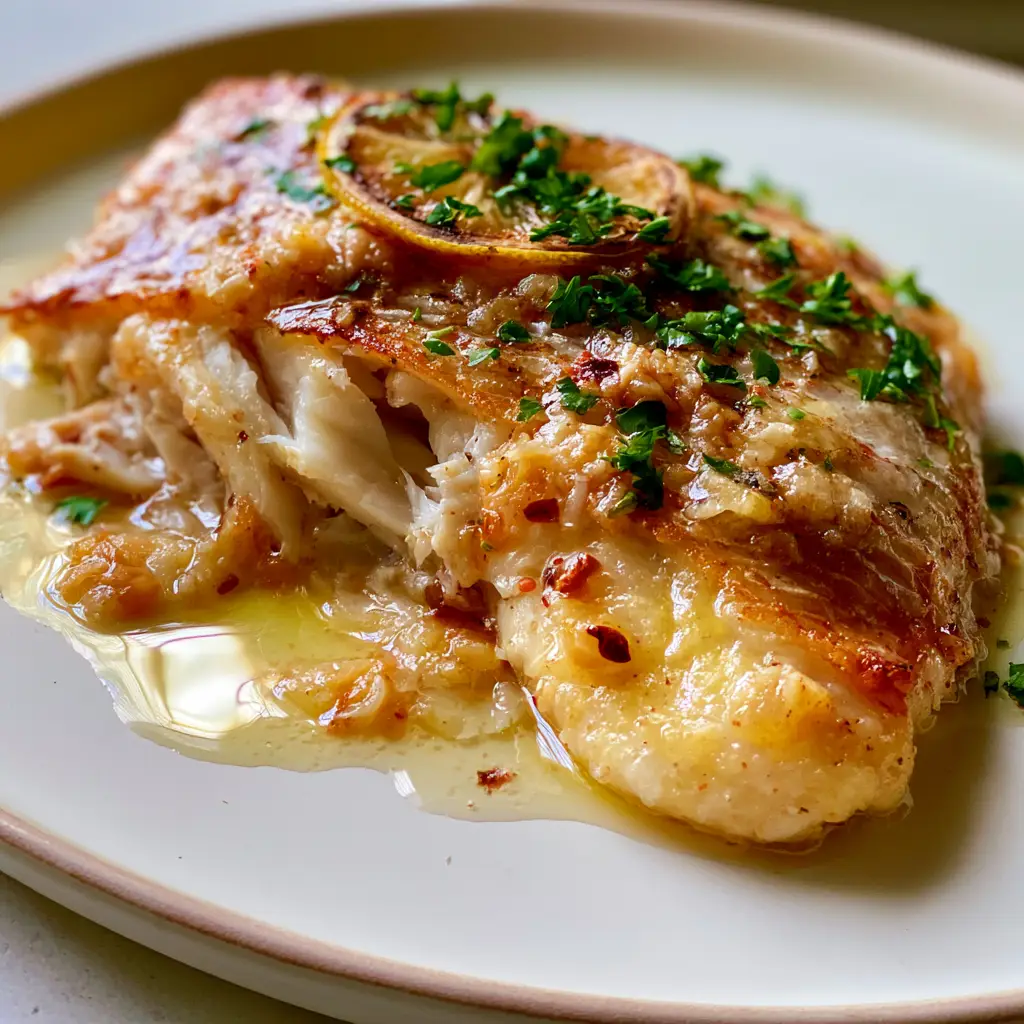
- The Ultimate Texture Contrast: You get a golden-brown, shattering crispy skin paired with meat that is visibly flaking apart into juicy sections.
- The Liquid Gold Sauce: A thick, glossy garlic butter sauce that coats every crevice of the fish, seasoned with red pepper flakes for a tiny hint of heat.
- Bright, Fresh Aromatics: The addition of a charred lemon slice and flaky sea salt elevates the natural sweetness of the snapper.
- Fast and Elegant: Despite its gourmet appearance, this meal comes together in less than 20 minutes, making it perfect for a weeknight win or a weekend dinner party.
If you love the technique used for this fish, you should also check out our guide on pan-seared cod fillets for another light and healthy dinner option. The key is all in the moisture control and the pan temperature.
Essential Ingredients for the Perfect Red Snapper
To achieve the results seen in our Visual Recipe Blueprint, you need specific components that work in harmony. Do not skip the prep; fish cooks fast, and you need everything ready to go.
- Red Snapper Fillets (6 oz / 170g each): Ensure they are skin-on. The skin is where the flavor and texture live. If you can’t find snapper, this method also works well for steelhead trout.
- Neutral High-Smoke Point Oil (2 tbsp / 30ml): Use avocado or grapeseed oil. Butter alone will burn before the skin gets crispy.
- Unsalted Butter (3 tbsp / 42g): This creates the base of our glossy garlic butter sauce. We add it late to “mount” the sauce without browning it too much.
- Fresh Garlic (4 cloves): You want these minced finely. Sautéed garlic provides a nutty, savory depth that powders simply cannot replicate.
- Red Pepper Flakes (1/2 tsp): These provide visual “jewels” in the sauce and a gentle warmth.
- Fresh Parsley (2 tbsp): Finely chopped fresh parsley adds a burst of chlorophyll and color.
- Lemon (1 large): We will use half for juice and the other half to create a charred lemon wheel for that smoky, acidic finish.
- Flaky Sea Salt: For that final crunch and hit of salinity that makes the fish “pop.”
The Secret to Shatteringly Crispy Skin
The biggest mistake home cooks make with red snapper is moisture. If the skin is wet, it will steam, not sear. Use a paper towel to pat the fish extremely dry—drier than you think is necessary.
Once dry, use a sharp knife to make three shallow scores across the skin. This prevents the fillet from curling up like a dry leaf when it hits the heat, ensuring the entire surface area of the skin maintains contact with the pan. If you enjoy this level of detail in seafood prep, you might also love our tips on garlic butter lobster and scallops.
How to Master the Pan-Sear: Step-by-Step
Step 1: The High-Heat Foundation
Place your heavy-bottomed skillet over medium-high heat. Add your neutral oil. You are looking for the oil to “shimmer” and just begin to send up a tiny wisp of smoke. This is the Visual & Sensory Cue that the pan is ready to create that golden-brown crust.
Step 2: The Initial Sear
Lay the red snapper fillets into the pan, skin-side down, laying them away from you to avoid oil splatter. Use a flexible fish spatula to press down firmly on the meat for the first 30 seconds. This guarantees the skin stays flat and even.
Leave it alone! For about 4-5 minutes, do not touch the fish. You will see the edges turn opaque and white. When the skin naturally releases from the pan and looks golden-brown and perfectly crisped, it is time to flip.
Step 3: The Butter Baste
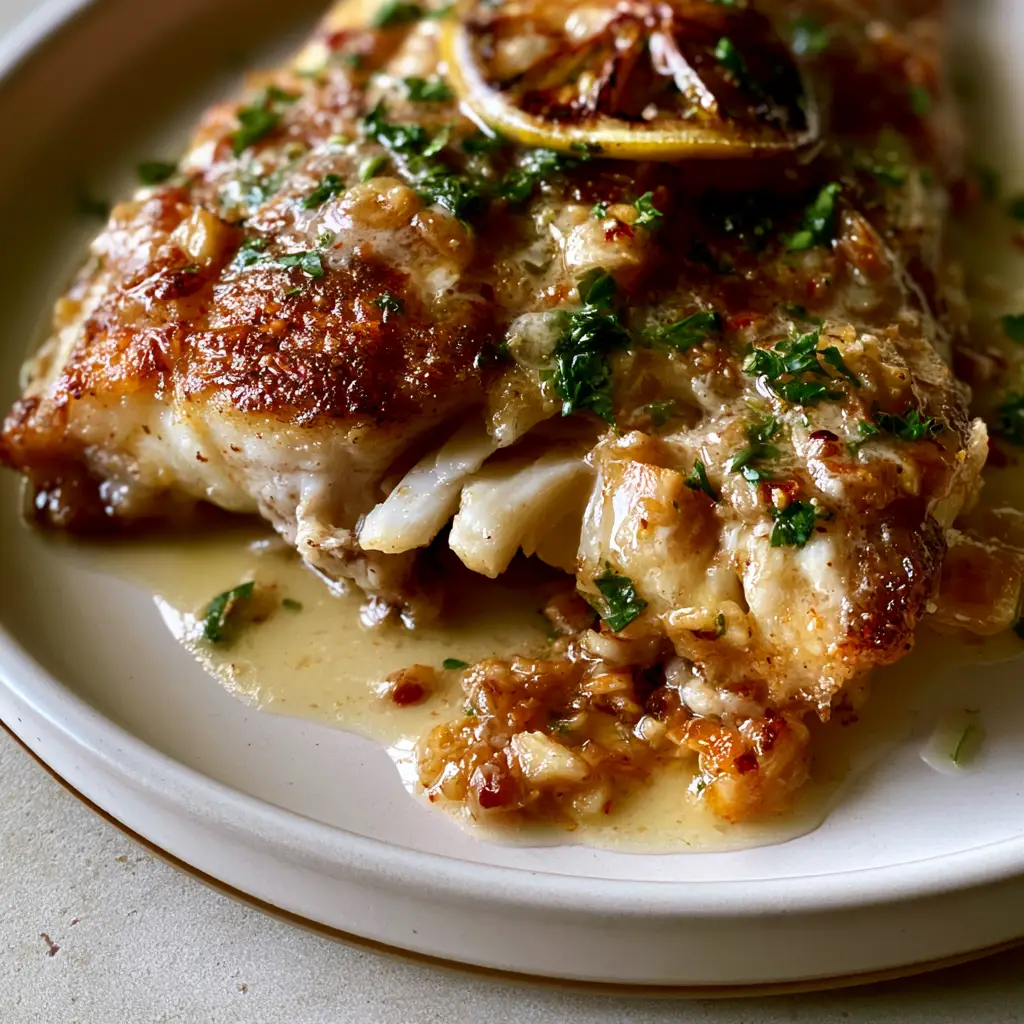
Flip the fillets gently. Immediately reduce the heat to medium and drop in the butter, minced sautéed garlic, and red pepper flakes. As the butter melts and begins to foam, tilt the pan and use a spoon to continuously pour that flavored fat over the fish.
This “basting” technique finishes the cooking process while infusing the flaky white fish meat with incredible richness. Throw your lemon slices into the empty spots of the pan to get them charred and caramelized.
Step 4: The Final Flourish
During the last 30 seconds, add the chopped fresh parsley and a squeeze of lemon juice directly into the butter. The sauce will emulsify into a thick, glossy garlic butter sauce. Remove the fish from the pan immediately to stop the cooking process.
If you prefer a bolder spice profile, you can adapt this technique using the seasoning blend from our blackened cod.
Expert Tips for Success
- Cold Butter is Better: Use cold butter when starting the sauce; it melts more slowly and creates a thicker, more glossy emulsion.
- Don’t Crowd the Pan: Cook in batches if necessary. If the fillets are too close, they will steam each other, ruining the crispy skin.
- Resting the Fish: Let the snapper rest for 2 minutes on a warm plate before serving. This allows the juices to redistribute so the meat is truly “juicy” when flaked.
- Check for Doneness: The fish is done when it reaches an internal temperature of 145°F (63°C) or when the meat flakes easily with a fork in the thickest part.
Storage, Reheating, and Freezing
Storage: Store any leftover red snapper in an airtight container in the refrigerator for up to 2 days. Be aware that the skin will lose its crispness once refrigerated.
Reheating: To preserve the texture, reheat in a 350°F (175°C) oven or toaster oven until warmed through. Avoid the microwave, as it will turn the delicate white meat rubbery.
Freezing: We do not recommend freezing cooked snapper, as the texture of the flaky white meat degrades significantly upon thawing.
What to Serve With This Dish
This elegant fish deserves sides that won’t overshadow its delicate flavor. A simple bed of jasmine rice or quinoa is perfect for soaking up that extra glossy garlic butter sauce.
For a low-carb option, serve with roasted asparagus or a light arugula salad. If you want a more Mediterranean vibe, consider serving alongside lemon garlic butter mussels for a complete seafood feast.
Frequently Asked Questions
Yes, but you must thaw it completely in the refrigerator and pat it dry even more thoroughly than fresh fish, as frozen fish tends to release more moisture.
The two keys are a very hot pan with shimmering oil and ensuring the fish skin is bone-dry. Use a fish spatula to press the fillet down for the first 30 seconds to ensure even contact.
The fish is done when the meat is opaque and flakes easily with a fork, or when it reaches an internal temperature of 145°F (63°C).
Sea bass, grouper, or steelhead trout are excellent substitutes that react similarly to this high-heat pan-searing method.
Scoring prevents the protein fibers in the skin from contracting and curling the fish into a ‘U’ shape, which ensures the entire skin surface stays in contact with the pan for maximum crispiness.
The Ultimate Crispy Red Snapper Recipe Card
Ready to get cooking? Follow the detailed measurements and instructions below to recreate this red snapper masterpiece in your own kitchen.
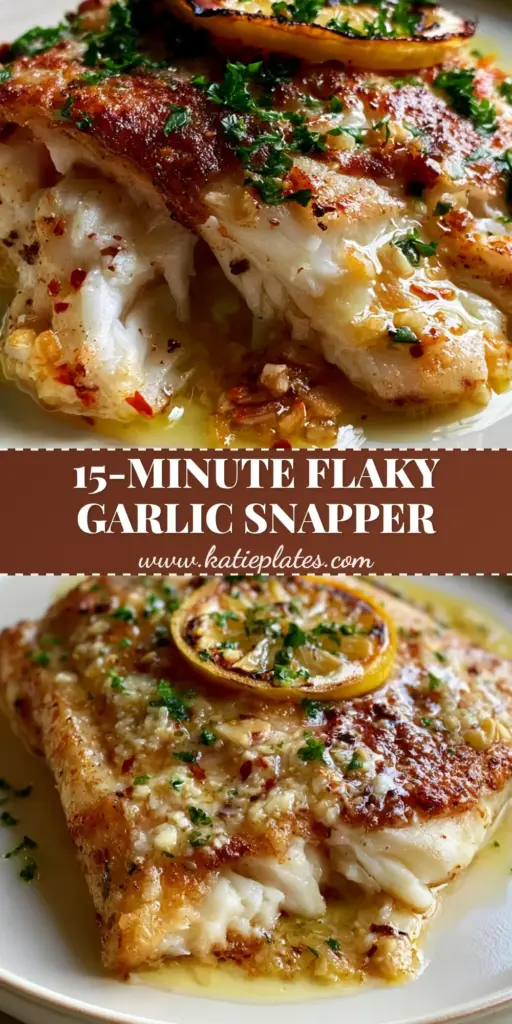
Red Snapper Recipe with Crispy Skin and Glossy Garlic Butter Sauce
Ingredients
Equipment
Method
- Pat the red snapper fillets extremely dry with paper towels. Score the skin lightly with a sharp knife.
- Add oil to a skillet over medium-high heat until shimmering. Place fish skin-side down and press for 30 seconds.
- Cook undisturbed for 4-5 minutes until the skin is golden and crispy. Flip the fillets.
- Add butter, garlic, and red pepper flakes to the pan. Spoon the foaming butter over the fish repeatedly.
- Add parsley and lemon juice. Baste for 1 more minute until the sauce is glossy and fish is opaque. Serve with charred lemon.
Notes
Use a stainless steel pan for the best crust formation.
Share Your Culinary Masterpiece!
Did you manage to get that perfectly crispy skin? We want to see it! Please save this recipe to your Pinterest board so you never lose it. If you made this, snap a photo and share it in the comments below or tag @katieplates on social media!
Don’t forget to leave a 5-star rating in the recipe card if you loved it—it helps other home cooks find our recipes. Happy searing!