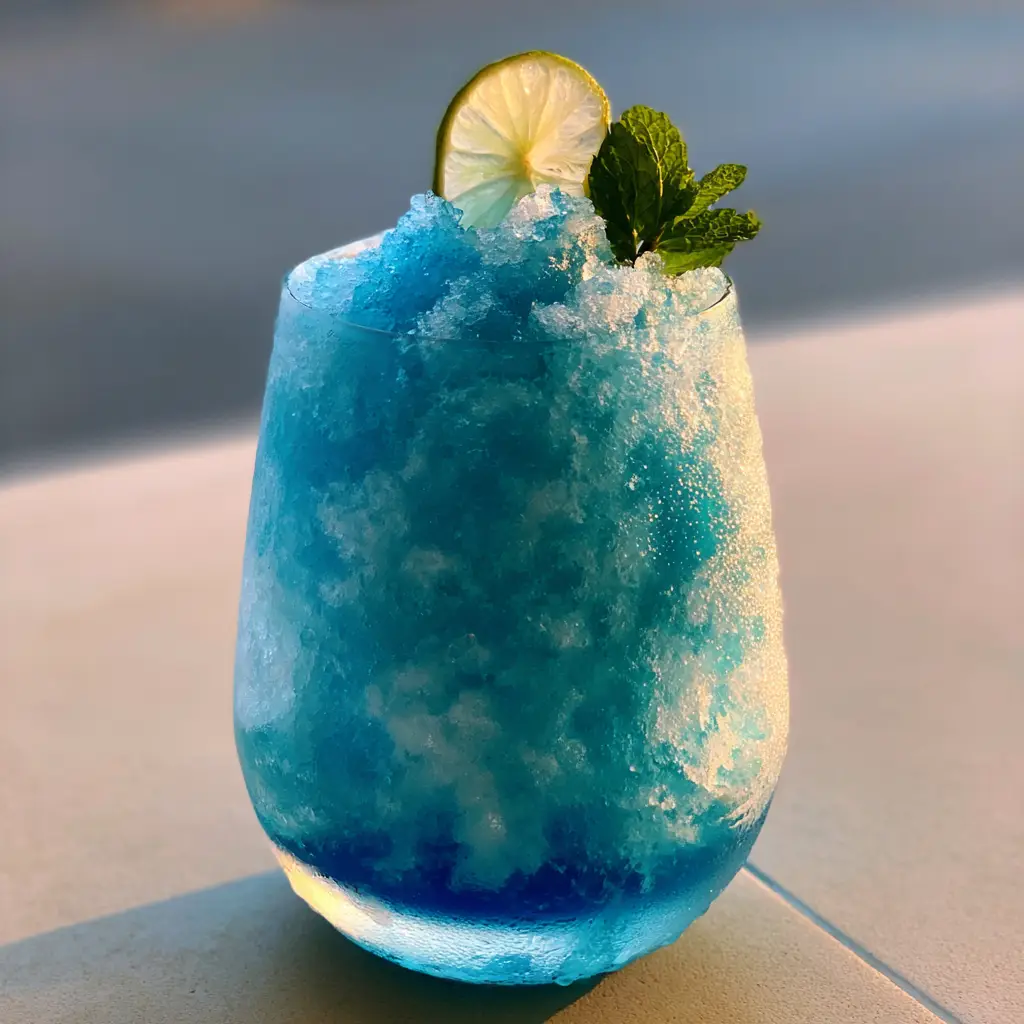
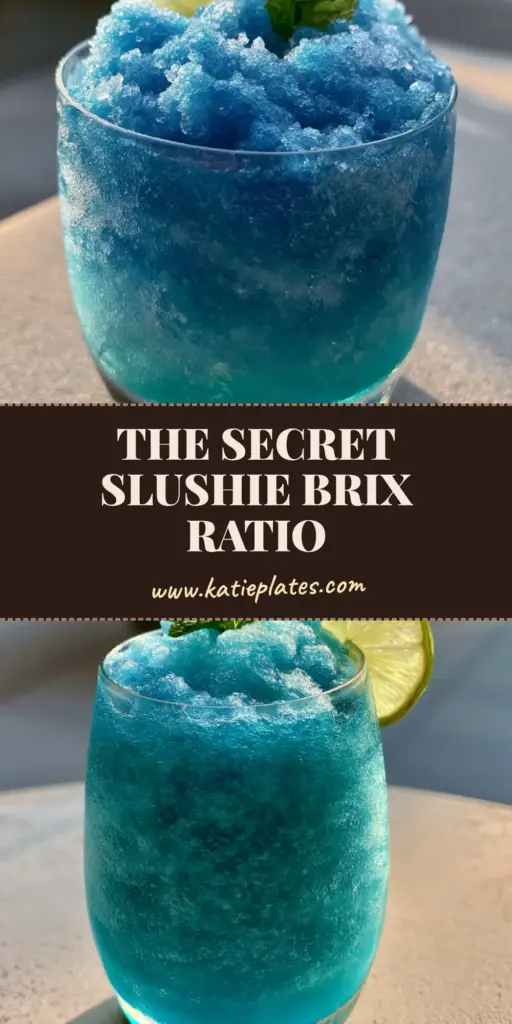
There is a specific, nostalgic magic found in the perfect frozen beverage, but most home versions fall short, resulting in crunchy ice chunks and diluted flavor. When exploring professional-grade slushie machine recipes, the goal isn’t just to freeze a liquid; it is to engineer a specific crystalline structure. This Electric Blue Raspberry Slushie is designed to produce micro-fine, velvety ice crystals that look like soft silk under the golden hour sun.
Using a handheld smartphone photo aesthetic, this recipe captures the vibrant, glowing essence of a summer afternoon on the patio. The heavy bottom of the glass anchors a drink that is as much a visual masterpiece as it is a refreshing treat. From the high-viscosity syrup that clings to the ice to the frosted glass condensation, every element is calibrated for maximum sensory impact.
Whether you are hosting a backyard gathering or looking for the perfect addition to your vibrant 4th of July food spread, this recipe delivers commercial-quality results. We are moving beyond basic crushed ice and into the realm of true fluid dynamics and culinary science.
Why This Blue Raspberry Recipe Redefines Frozen Refreshment
- Micro-Fine Texture: We utilize specific brix levels (sugar content) to ensure the ice crystals are velvety and smooth, never chunky or sharp.
- Visual Brilliance: The use of high-viscosity blue raspberry syrup creates a deep, electric glow that looks incredible in a heavy-bottomed glass.
- Sophisticated Garnish: A paper-thin lime wheel and a small mint sprig break the sweetness with essential oils and bright acidity.
- Perfect Viscosity: By balancing water and syrup, we ensure a “long-pour” consistency that holds its shape against a thick translucent straw.
The Essential Components for Electric Blue Bliss
High-Viscosity Blue Raspberry Syrup: 1.5 cups (355ml). This syrup is the backbone of the recipe, providing both the intense “electric blue” pigment and the sugar required to lower the freezing point of the water. High viscosity ensures the syrup doesn’t just sink to the bottom but coats every micro-crystal of ice.
Filtered Water: 4 cups (950ml). Using filtered water is crucial for a clean flavor profile; impurities in tap water can interfere with the formation of the smooth, silk-like ice crystals described in our visual blueprint.
Fresh Lime Juice: 1 tbsp (15ml). While not always visible in the final glow, the acidity of the lime acts as a flavor bridge, cutting through the heavy sugar of the raspberry syrup to provide a balanced finish.
Paper-Thin Lime Wheels: 1-2 slices. These must be sliced with a mandoline or a very sharp knife to achieve the “paper-thin” look that allows light to pass through the citrus flesh during golden hour.
Fresh Mint Sprigs: 2 small sprigs. The mint provides a cooling aromatic contrast to the sweet raspberry, and its bright green color pops against the vibrant blue liquid.
Optional Vegetable Glycerin: 1 tsp (5ml). This is a professional “invisible” ingredient used in high-end slushie machine recipes to improve the “scoopability” and prevent the slush from hardening into a solid block.
The Professional Tool Kit for Frozen Success
To achieve the handheld photo aesthetic of a perfect slushie, you need more than just a standard blender. A dedicated counter-top slushie machine or a high-powered blender with a “snow” setting is essential for creating those micro-fine shaved ice crystals. You will also need a tall, heavy-bottomed glass to provide the thermal mass necessary to maintain the “frosted glass” look.
A thick translucent straw is required not just for style, but for function; the high viscosity of this recipe makes it difficult to draw through a standard thin straw. Finally, keep a spray bottle of room-temperature water nearby to mist the outside of your glass, creating that hyper-realistic condensation and frost for your photos.
Mastering the Freeze: Step-by-Step Slushie Perfection
Phase 1: Calibrating the Slushie Base
In a large pitcher, combine 4 cups (950ml) of filtered water with 1.5 cups (355ml) of high-viscosity blue raspberry syrup. Stir gently but thoroughly; you want a completely homogenous mixture with no streaks of clear water remaining. If you are looking for more fruit-forward variations later, consider trying a refreshing watermelon slushie using similar brix-balancing techniques.
Add the 1 tbsp (15ml) of lime juice and the optional vegetable glycerin. This step is the “Culinary Forensics” portion of the recipe—balancing the sugar-to-water ratio (the Brix scale) to ensure the machine produces a velvet-like swirled texture rather than a gritty, snowy one.
Phase 2: The Freezing Process
Pour the mixture into your slushie machine’s reservoir. Set the machine to its “Slush” or “Freeze” mode. If your machine allows for “consistency” or “thickness” adjustments, aim for a medium-high setting. This ensures the blue liquid glows from within while maintaining enough structural integrity to hold a swirl.
Observe the machine as it works. You are looking for a visual cue: the liquid should transition from a dark blue translucent state to an opaque, shimmering “silk” appearance. This usually takes 45-60 minutes depending on your ambient room temperature. If you are preparing this as part of a larger menu, it pairs beautifully with easy summer dinner recipes while the machine does the hard work.
Phase 3: The Art of the Pour and Garnish
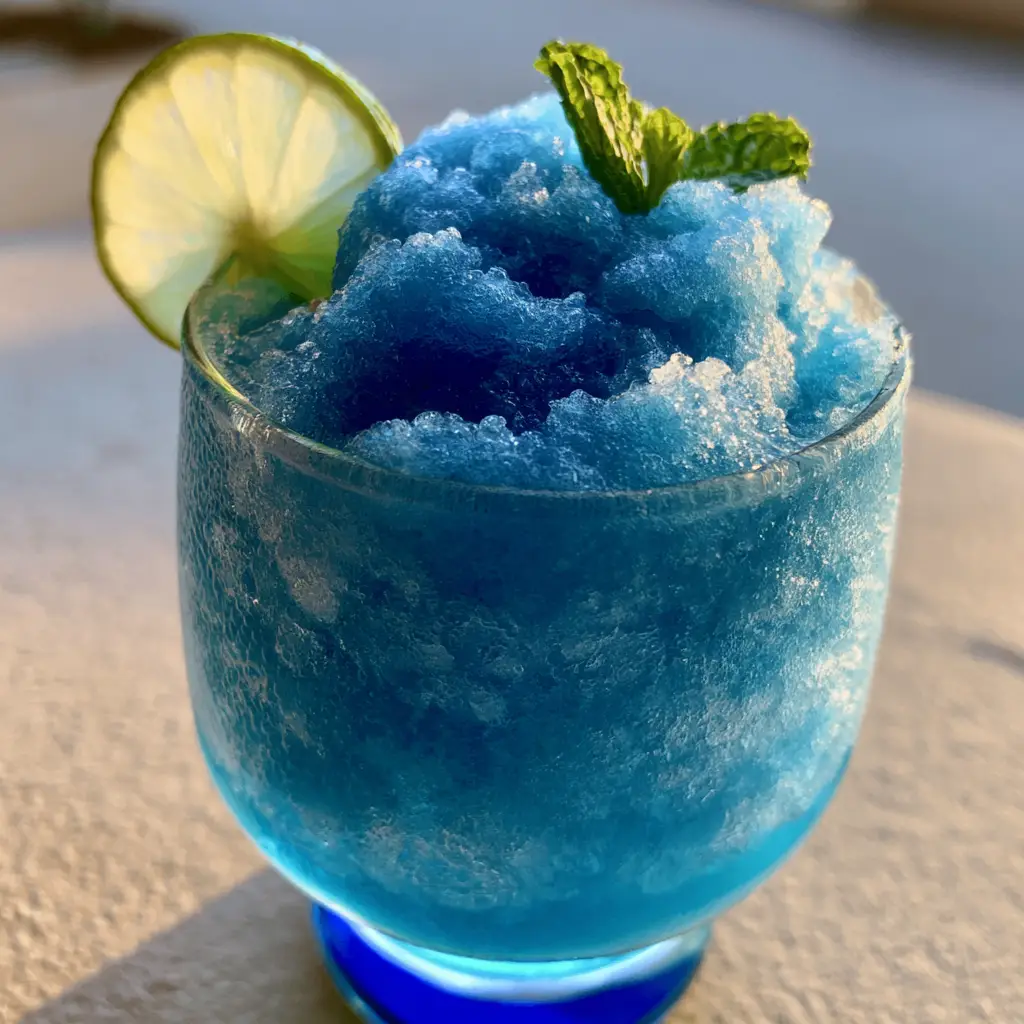
Once the consistency is micro-fine and velvety, prepare your heavy-bottomed glass. For the best “frosted” effect, place the glass in the freezer for 10 minutes before serving. Drizzle a very thin layer of extra blue syrup (approx. 1 tsp) at the bottom of the glass to create that “electric blue” depth visible in the blueprint.
Dispense the slushie into the glass, allowing it to naturally swirl. Use a small offset spatula or the back of a spoon to create a soft peak at the top. Immediately place one paper-thin lime slice on the rim or floating atop the ice, and tuck a small mint sprig right next to the thick translucent straw. The contrast between the bright green mint and the vibrant blue ice is the hallmark of professional slushie machine recipes.
Expert Tips for Success with Slushie Machine Recipes
- The 15% Rule: Most slushie machines require a sugar content of 13-15% to freeze correctly. If your syrup is “sugar-free,” the machine will likely freeze into a solid block of ice, potentially damaging the motor.
- Temperature Control: If your slushie is too “soupy,” your syrup-to-water ratio may be too high. If it is too “icy,” you may need a touch more syrup to lower the freezing point further.
- The Condensation Trick: To get that “handheld smartphone photo” look, handle the glass as little as possible. The heat from your hands will melt the frost. Use a napkin to hold the base if moving it to a patio for golden hour lighting.
- Flavor Variations: Once you master this blue raspberry base, you can apply the same science to other favorites like a creamy pina colada smoothie or even fruit-puree based drinks.
Storage and Maintenance Advice
If you have leftover slushie mix, it is best kept in the slushie machine on “Standby” or “Night Mode,” which keeps the liquid cold without freezing it solid. This maintains the brix balance and prevents the ingredients from separating. Never leave the machine running on “Freeze” overnight, as the ice can become too thick for the auger to turn.
For home cooks without a “Standby” mode, pour the remaining liquid into a freezer-safe container. When ready to serve again, let it thaw for 15 minutes and run it through a high-powered blender to restore that micro-fine, velvety texture. Do not refreeze more than once, as the ice crystals will grow larger and lose their silk-like quality.
What to Serve With This Slushie
This vibrant blue raspberry treat is a staple for outdoor summer dining. It acts as a palate cleanser for richer dishes. Pair it with savory summer chicken recipes or perhaps some fun watermelon fries for a complete poolside snack menu. The high sugar and bright acidity of the slushie make it a fantastic companion to salty appetizers or spicy grilled meats.
Frequently Asked Questions
Yes, but you will need a high-powered blender. Use the ‘pulse’ or ‘snow’ setting with pre-frozen cubes of the mixture rather than blending ice cubes with liquid syrup to achieve a similar velvet texture.
Most slushie machines require a brix (sugar) level of 13-15% to prevent the liquid from freezing into a solid block of ice. If using sugar-free syrup, you must add a freezing point depressant like vegetable glycerin or erythritol to protect your machine’s motor.
Place your heavy-bottomed glasses in the freezer for at least 15 minutes before serving. Once filled, the humidity in the air will naturally hit the cold glass, creating a frost effect and heavy condensation.
Flush the system with warm, soapy water followed by a clear water rinse. Most professional slushie machine recipes recommend sanitizing the tank once a week to prevent sugar buildup and maintain motor efficiency.
This usually happens when the ice crystals are too large or the syrup viscosity is too low. Using a high-viscosity syrup and ensuring your machine runs long enough to create micro-fine crystals will keep the flavor suspended.
The Ultimate Blue Raspberry Slushie Recipe Card
Slushie Machine Recipes: The Ultimate Electric Blue Raspberry Silk Slushie
Ingredients
Equipment
Method
- In a large pitcher, whisk together the filtered water, blue raspberry syrup, lime juice, and optional vegetable glycerin until completely combined.
- Pour the mixture into your slushie machine. Turn on the freeze setting and allow to cycle until the liquid transforms into micro-fine, velvety ice crystals (approx. 45-60 mins).
- Dispense the slush into chilled, heavy-bottomed glasses. Add a thin layer of syrup at the bottom first. Top with a paper-thin lime wheel, a mint sprig, and a thick straw.
Notes
Pre-chill your glasses in the freezer to maintain the 'frosted glass' look and heavy condensation.
Conclusion and Call to Action
Mastering slushie machine recipes is about more than just pressing a button; it’s about understanding the delicate balance between sugar, water, and temperature. This Electric Blue Raspberry Slushie proves that you can achieve commercial, silk-like textures at home with the right techniques. The combination of the micro-fine ice crystals and the sophisticated lime and mint garnish makes this a standout drink for any occasion.
If you enjoyed this deep dive into frozen mixology, please leave a comment below and let us know how your texture turned out! Don’t forget to follow katieplates on Pinterest for more visual recipe blueprints and summer inspiration. Share your golden hour slushie photos with us—we love seeing your culinary forensic successes!