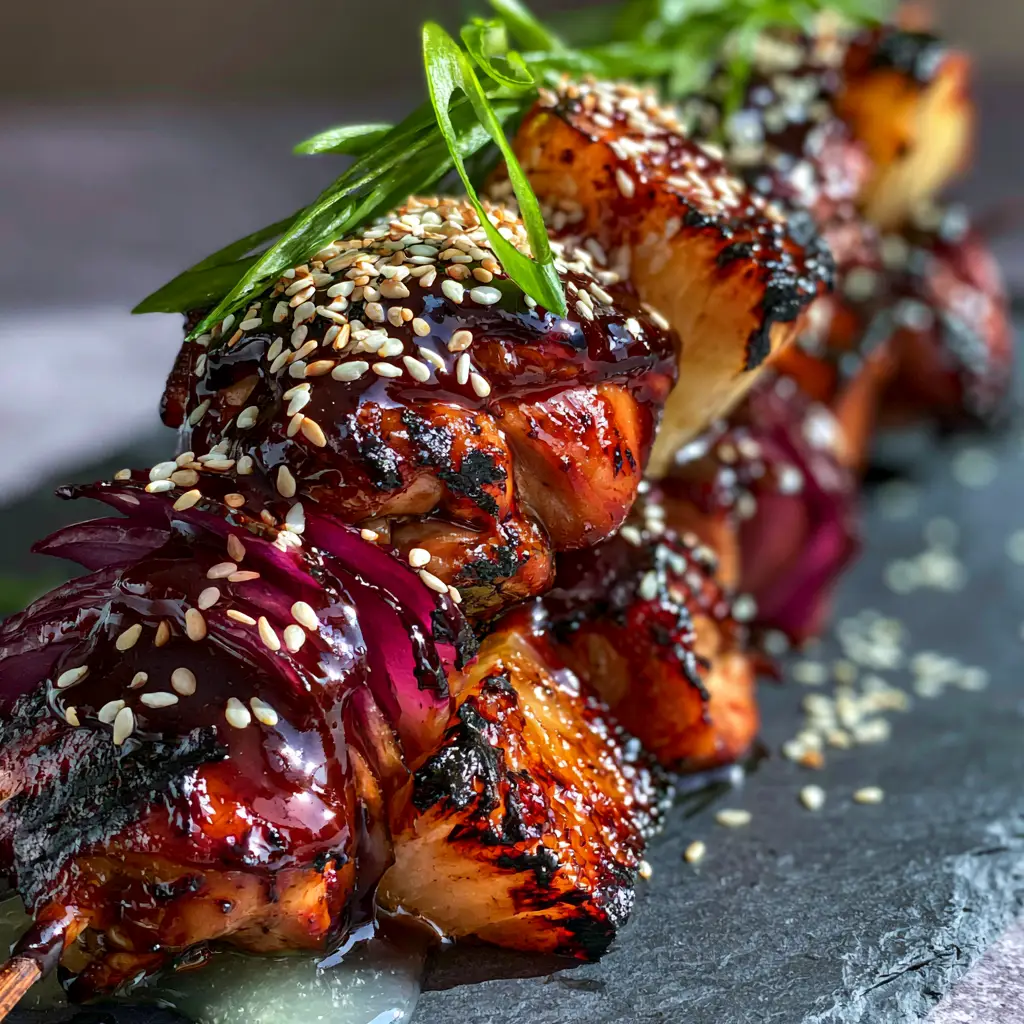
There is nothing quite like the sight of Hawaiian teriyaki chicken kabobs glistening under the soft glow of natural morning sunlight. When you imagine the perfect summer skewer, your mind likely drifts to that specific contrast: deeply charred, savory meat paired with the vibrant, candy-like sweetness of caramelized fruit.
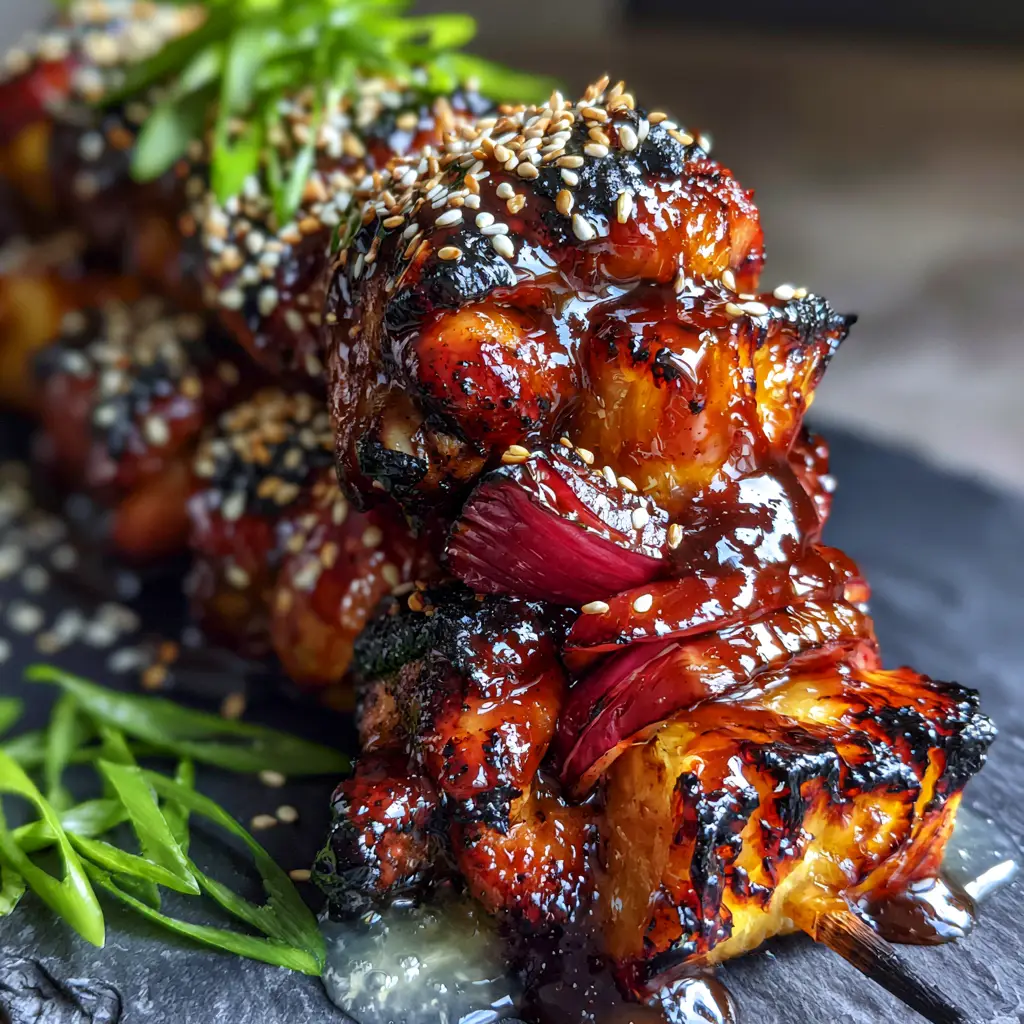
This recipe isn’t just about throwing meat on a stick; it is a masterclass in achieving a professional-grade culinary finish. We are targeting a mahogany-colored, mirror-like shine on the glaze that clings to every crevice of the charred chicken thighs, accented by the bright pop of paper-thin green scallions.
Whether you are hosting a backyard luau or simply craving a high-end “foodie” experience at home, these kabobs deliver a sensory explosion. From the sizzle of the pineapple on the grates to the aromatic toasted sesame seeds, every element is designed for maximum flavor and visual impact.
The Secrets Behind the Ultimate Hawaiian Teriyaki Chicken Kabobs
- Extreme Caramelization: By using fresh pineapple, we harness natural sugars that create those coveted “burnt sugar edges” during the searing process.
- The Mahogany Mirror Finish: Our specific reduction technique ensures the teriyaki glaze is thick, glossy, and dark enough to reflect light, just like a high-end restaurant dish.
- Textural Contrast: We balance the tender, softened red onion petals with the crunch of toasted white sesame seeds and the snap of fresh scallions.
- Optimal Fat Content: Using boneless, skinless chicken thighs instead of breasts ensures the meat remains succulent and juicy even under high-heat charring.
Essential Ingredients for the Perfect Island Skewer
Boneless Skinless Chicken Thighs: 2 lbs (900g). Thighs are the secret to the best Hawaiian teriyaki chicken kabobs because their higher fat content allows for deep charring without drying out the interior.
Fresh Pineapple Wedges: 3 cups (450g). Avoid canned pineapple if possible; fresh fruit contains the enzymes and structural integrity needed to achieve those beautiful caramelized edges without falling apart.
Red Onion Petals: 2 large (300g) onions. Cutting these into wide petals allows them to soften and catch the glaze, providing a savory, slightly pungent counterpoint to the sweet fruit.
The Ultimate Mahogany Glaze: A blend of 1 cup (240ml) low-sodium soy sauce, ½ cup (100g) brown sugar, 1 tbsp (15g) grated ginger, and a cornstarch slurry. This combination creates the thick, viscous texture required for a “mirror” finish.
Toasted White Sesame Seeds: 2 tbsp (18g). These provide a delicate nutty crunch and a visual highlight against the dark, sticky sauce.
Fresh Green Onions: 4 stalks (60g). Slicing these paper-thin adds a “spray” of vibrant green that cuts through the richness of the teriyaki.
Foundational Seasonings: 2 tbsp (30ml) neutral oil (like avocado or vegetable oil) for high-heat searing, and 1 tsp (6g) kosher salt to enhance the natural flavors of the chicken before glazing.
Professional Tools for a Flawless Sear
To replicate the high-end look of our Hawaiian teriyaki chicken kabobs, you will need a heavy-duty grill or a cast-iron grill pan. The heat retention of cast iron is critical for creating those defined, dark char marks on the chicken chunks.
You will also need long bamboo or stainless steel skewers. If using bamboo, ensure you soak them in water for at least 30 minutes to prevent them from splintering or burning during the cooking process.
A high-quality pastry brush is non-negotiable. To achieve a thick, layered glaze, you must be able to “paint” the sauce onto the meat in multiple stages as it cooks, building up that mahogany luster.
The Step-by-Step Guide to Mahogany Glazed Perfection
Preparing the Chicken and Aromatics
Start by trimming your chicken thighs of excess fat, but leave enough to ensure flavor. Cut the meat into uniform 1.5-inch (4cm) chunks.
Consistency in size is the only way to ensure the chicken reaches its safe internal temperature at the exact moment the pineapple begins to caramelize. Toss the chicken in a light coating of oil and a pinch of salt to prep the surface for the Maillard reaction.
Crafting the Mirror-Shine Teriyaki Glaze
In a small saucepan over medium heat, combine your soy sauce, brown sugar, ginger, and a splash of pineapple juice. Bring to a simmer until the sugar is fully dissolved.
To get that incredibly thick, glossy finish seen in our visuals, whisk in a cornstarch slurry (1 tbsp cornstarch mixed with 1 tbsp water). Simmer for 3-5 minutes until the sauce coats the back of a spoon and looks like dark liquid glass.
Threading for Success
Thread the skewers by alternating between chicken, a red onion petal, and a pineapple wedge. Do not crowd the skewers too tightly; leaving a tiny bit of space allows the heat to circulate and char the sides of the chicken.
Ensure the “skin side” or smooth side of the chicken thigh chunks is facing outward. This provides the best surface area for those iconic grill marks.
High-Heat Searing and Glazing Techniques
Preheat your grill to medium-high (approx. 400°F/200°C). Place the skewers diagonally across the grates. Listen for that immediate, aggressive sizzle—that is the sound of flavor developing.
Sear for 4-5 minutes per side. Once the chicken shows deep, dark char marks, begin the glazing process. Brush a generous layer of the mahogany sauce over the top.
Flip and glaze again. The sugar in the sauce will bubble and “lacquer” onto the meat. Continue this for another 3-4 minutes until the chicken is cooked through and the pineapple has visible burnt sugar edges.
Expert Tips for High-End Results
- The Juice Trick: If your glaze becomes too thick, whisk in 1 tsp (5ml) of clear pineapple juice. This thins it slightly while adding a bright acidity that cuts through the salt.
- Cold Meat, Hot Grill: Keep your chicken chilled until the very moment it hits the heat. This helps get a better sear on the outside without overcooking the center.
- The Garnish Layering: Apply the toasted sesame seeds immediately after the final glaze while it is still “tacky” so they stick perfectly. Add the scallions at the very end to keep them from wilting.
- Avoid the “Sugar Burn”: Do not apply the teriyaki sauce at the very beginning. The high sugar content will burn and turn bitter before the chicken is cooked. Wait until the last 4 minutes of grilling.
Storage and Reheating Guidelines
Store any leftover Hawaiian teriyaki chicken kabobs in an airtight container in the refrigerator for up to 3 days. To maintain the glossy texture, it is best to remove the meat and fruit from the skewers before storing.
When reheating, avoid the microwave if possible, as it can make the chicken rubbery. Instead, place the pieces in a skillet over medium heat with a tablespoon of water or extra sauce. Cover with a lid for 2 minutes to steam-heat them back to juicy perfection.
You can also freeze the raw, marinated chicken (without the fruit) for up to 2 months. However, fresh pineapple does not freeze well for grilling, so always use fresh fruit when you are ready to cook.
What to Serve with Hawaiian Teriyaki Chicken
These kabobs are a complete meal on their own, but they pair beautifully with a side of fluffy jasmine rice or a crisp slaw. If you are looking to expand your menu, consider serving them alongside a Hawaiian chicken sheet pan for a larger crowd.
For those who love the flavor profile but want a different format, the leftovers make an incredible teriyaki chicken wrap for lunch the next day. If you need to keep things strictly gluten-free, ensure you use tamari in your sauce as outlined in our gluten-free teriyaki chicken guide.
If you’re in the mood for more global poultry inspiration, you might also enjoy the aromatic spices of Chicken Kabsa or the creamy comfort of coconut chicken curry.
Frequently Asked Questions
While you can use breast meat, chicken thighs are highly recommended for Hawaiian teriyaki chicken kabobs. Thighs have a higher fat content that allows for deep, mahogany-colored charring without the meat becoming dry or rubbery.
Soak your bamboo skewers in room-temperature water for at least 30 minutes before threading. This hydrates the wood, ensuring it resists the high heat of the grill long enough for the chicken to cook through.
To make these kabobs gluten-free, simply swap the soy sauce for certified gluten-free tamari or coconut aminos. The rest of the ingredients are naturally gluten-free.
Fresh pineapple is superior for kabobs. It holds its shape better on the skewers and contains more natural sugars on the surface, which leads to those beautiful ‘burnt sugar edges’ that canned fruit often lacks.
A mirror-like shine comes from the reduction of sugars and the addition of a cornstarch slurry. Ensure you simmer the sauce until it is thick enough to coat a spoon heavily. Also, brushing the glaze on in layers during the final minutes of grilling builds that reflective luster.
The Best Hawaiian Teriyaki Chicken Kabobs Recipe
Hawaiian Teriyaki Chicken Kabobs with a Glossy Mahogany Glaze
Ingredients
Equipment
Method
- Cut chicken thighs into uniform 1.5-inch chunks. Toss with oil and a pinch of salt.
- Simmer soy sauce, brown sugar, and ginger. Whisk in cornstarch slurry and cook until a thick, mahogany-colored glossy glaze forms.
- Alternate chicken, red onion, and pineapple on skewers. Ensure smooth sides of chicken face outward.
- Place on a high-heat grill. Sear for 4-5 minutes per side until deep char marks appear.
- Brush the thick glaze liberally over the kabobs during the last 4 minutes of cooking, flipping frequently to build a mirror-like shine.
- Remove from heat. Garnish with a heavy dusting of toasted sesame seeds and a spray of sliced green onions.
Notes
Apply the glaze only in the final stages of grilling to prevent the sugars from burning.
Closing & Call to Action
Mastering the art of the Hawaiian teriyaki chicken kabobs is a gateway to becoming a true grill master. The combination of the mahogany-colored glaze and the charred pineapple edges creates a dish that tastes just as stunning as it looks. The secret is all in the glaze reduction and the high-heat sear.
If you enjoyed this recipe, please leave a comment below and let me know how your char turned out! Don’t forget to snap a photo and tag me on social media. For more visual inspiration and to save this recipe for your next summer cookout, follow me on Pinterest and pin this post!