There is a specific, soul-warming magic found in a fresh batch of Haitian beignets. If you have ever stood in a sun-drenched kitchen in the Caribbean, you know the scent—ripe, caramelized bananas mingling with the heady aroma of fermented dough and warm cinnamon. These aren’t just your standard fritters; they are a masterpiece of texture, boasting a deep-fried golden-brown crispy crust that shatters to reveal an airy honeycomb interior.
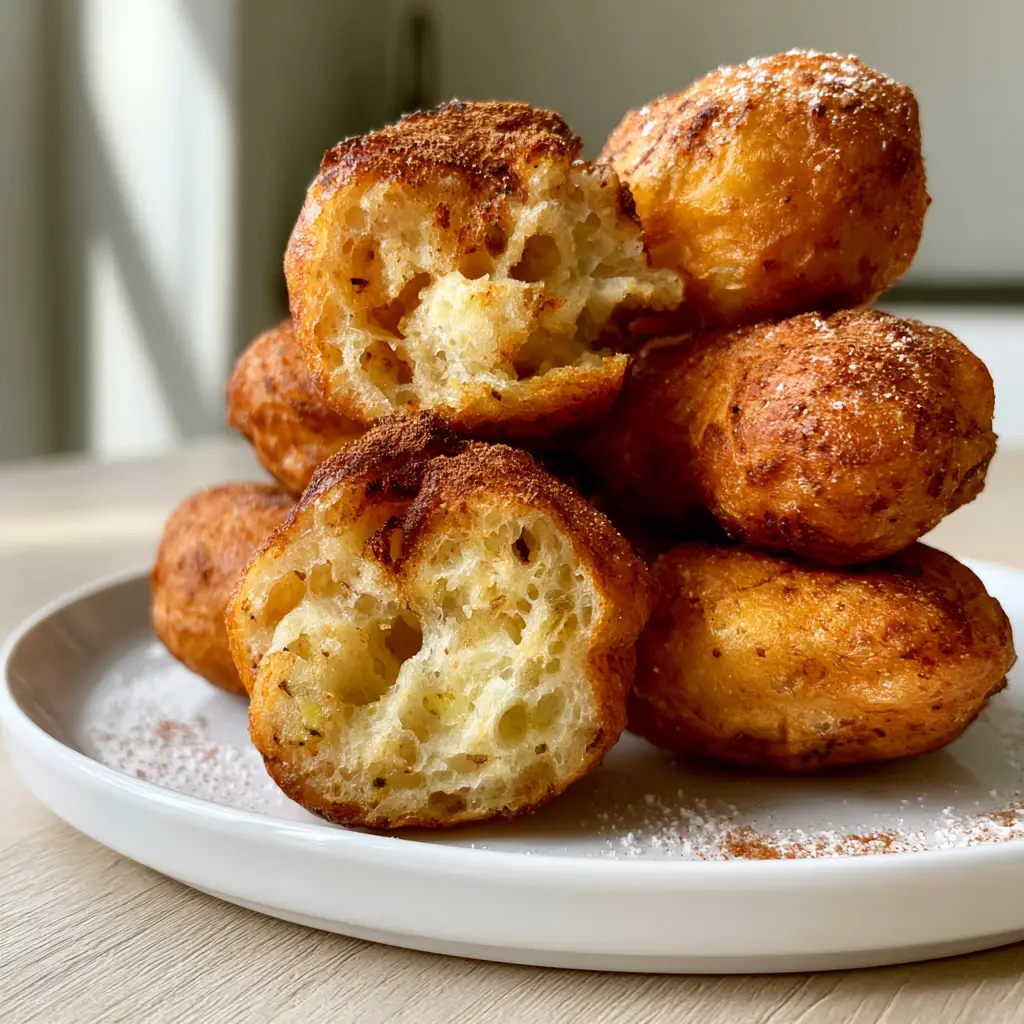
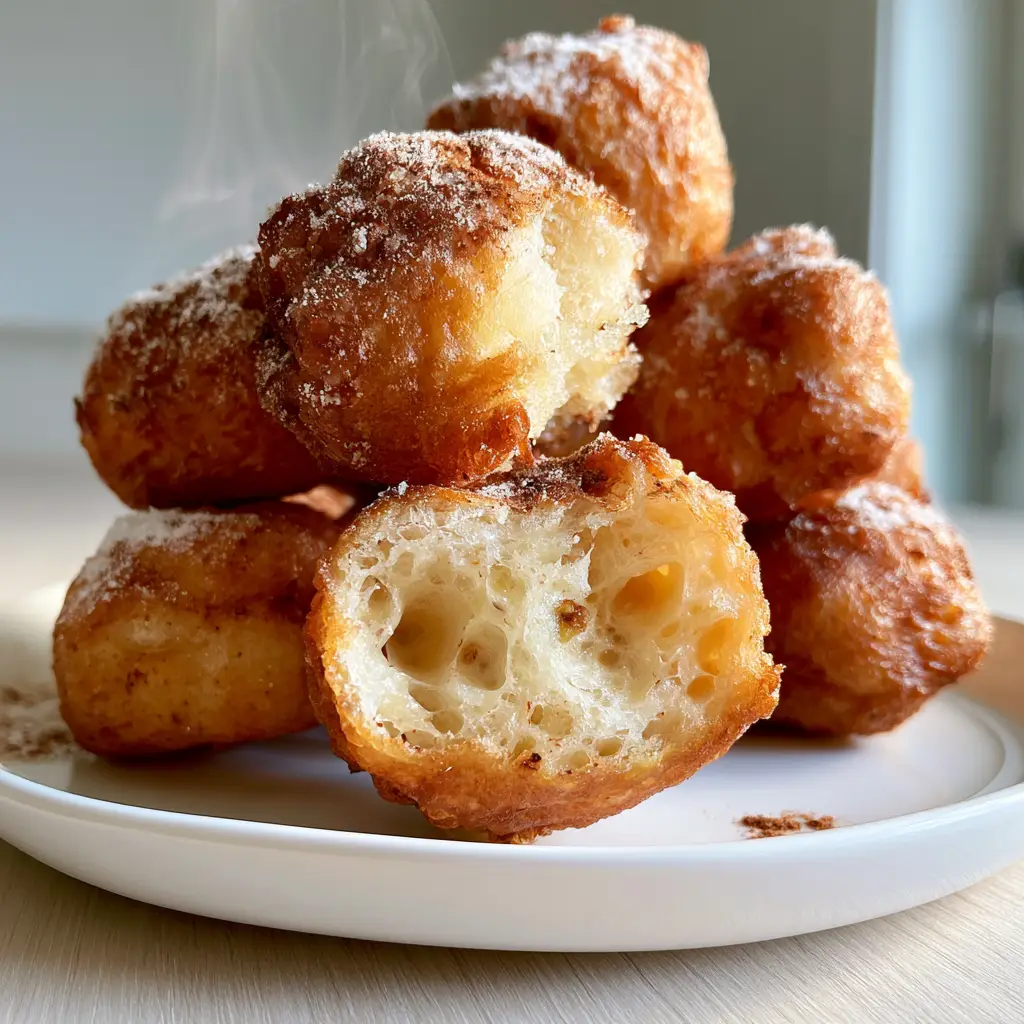
In this guide, we are recreating the exact sensory experience captured in high-end culinary photography. Imagine a stack of these pillowy delights, lightly dusted with a fine mist of powdered sugar and a pinch of ground cinnamon, with visible steam wisps rising from a hero beignet torn open to reveal its porous, cloud-like center. By focusing on traditional fermentation and the science of the perfect fry, you can achieve this professional result at home.
The Anatomy of the Perfect Haitian Banana Beignet
To achieve the specific visual and structural results required for an authentic “Benye,” we must look closely at the components that make this dish iconic. Unlike heavy, cake-like doughnuts, these beignets rely on a specific fermentation process to create those sought-after air pockets.
- The Golden-Brown Crust: A result of Maillard reaction and the natural sugars in the banana caramelizing at 350°F (175°C).
- The Honeycomb Interior: Achieved through a slow-rise yeast fermentation that creates large, irregular air bubbles within the dough.
- The Ripe Banana Mash: Using “cheetah-spotted” bananas ensures a deep sweetness and tiny specks of fruit visible in the dough.
- The Sensory Topping: A delicate balance of fine powdered sugar and micro-specks of cinnamon for an aromatic finish.
Essential Components for the Perfect Fermented Dough
Every ingredient in this recipe serves a structural or chemical purpose. While the visual prompt highlights the beautiful exterior, the “invisible” ingredients like yeast and salt are what make the “honeycomb” interior possible.
Overripe Bananas: Use 3 medium (approx. 300g) overripe bananas. The higher the sugar content, the better the fermentation and the deeper the golden-brown color becomes during frying.
Active Dry Yeast: You will need 2 1/4 tsp (7g) of yeast. This is the engine of the recipe, responsible for the airy, pillowy interior that defines the Haitian style.
All-Purpose Flour: 2 cups (250g) of flour provides the gluten structure necessary to hold those steam-filled air pockets without collapsing.
Granulated Sugar: 1/4 cup (50g) of sugar feeds the yeast and aids in the “blistered” appearance of the golden crust.
Warm Water or Milk: 1/2 cup (120ml) at 110°F (43°C) to activate the yeast. Using milk can result in a richer crumb, similar to standard classic pancakes.
Ground Cinnamon & Nutmeg: 1 tsp (2.5g) of cinnamon and 1/4 tsp (1g) of nutmeg. These provide the tiny dark specks visible in the torn-open beignet and a warm, tropical aroma.
Neutral Frying Oil: High-smoke point oil like vegetable or canola. You need enough to submerge the dough so it can expand evenly and achieve that “airy” volume.
Powdered Sugar: For the final “fine mist” dusting that adds a touch of sweetness and high-contrast visual appeal against the dark crust.
Must-Have Kitchen Tools for Golden Success
Achieving the macro-photography look requires precision. To ensure your beignets look as good as they taste, gather these essential tools before starting.
A heavy-bottomed Dutch oven or deep fryer is vital for maintaining a consistent temperature. Fluctuating heat leads to oily dough rather than a crisp, golden-brown crust. You will also need a digital thermometer to track the oil precisely.
A fine-mesh sieve is the secret to that “fine mist” of powdered sugar. Using a spoon creates clumps; a sieve creates the professional, even dusting seen in our visual blueprint. Finally, a wire cooling rack is essential to prevent the bottom of the beignets from becoming soggy as the steam escapes.
The Scientific Path to a Honeycomb Interior
Creating Haitian beignets is a lesson in patience. The fermentation process cannot be rushed if you want those beautiful, visible honeycomb air pockets.
Step 1: Activating the Yeast Engine
In a small bowl, combine your warm water (110°F/43°C) with a teaspoon of the sugar. Sprinkle the yeast over the top and let it sit for 5-10 minutes until it becomes foamy. This ensures your leavening agent is alive and ready to lift the heavy banana mash.
Step 2: Preparing the Banana Mash Texture
Peel your bananas and mash them in a large bowl until almost smooth, but leave tiny specks of banana for texture. Whisk in the remaining sugar, salt, cinnamon, and nutmeg. The salt is a foundational “invisible” ingredient that balances the sweetness and strengthens the gluten.
Step 3: Building the Fermented Dough
Add the activated yeast mixture to the banana mash. Gradually fold in the flour (2 cups/250g). The dough should be thick and slightly sticky, not a dry ball of dough. Cover the bowl with a damp cloth and place it in a warm, draft-free spot for 1 to 2 hours.
Step 4: Monitoring the Rise
During this time, the yeast consumes the sugars from the banana and granulated sugar, releasing carbon dioxide. Look for the dough to double in size and show visible bubbles on the surface. This is the “Visual Cue” that your honeycomb interior is forming.
Step 5: The Art of the Golden Fry
Heat your oil to exactly 350°F (175°C). Use a small ice cream scoop or two spoons to drop roughly 2 tablespoons (30ml) of dough into the oil. Do not overcrowd the pot, as this will drop the oil temperature and lead to greasy fritters.
Step 6: Achieving the Crispy Crust
Fry each side for 2-3 minutes. You are looking for a deep, rich golden-brown. Because of the banana content, these will be darker than a standard beignet. Use a slotted spoon to remove them once they feel light and sound “hollow” when tapped.
Pro-Tips for Achieving a Crisp, Non-Greasy Crust
- Temperature Control: If the oil is too cold, the dough absorbs it. If too hot, the outside burns before the “airy” interior sets. Stay between 350°F-360°F.
- Degassing the Dough: Do not over-mix the dough after it has risen. You want to preserve as many of those air bubbles as possible to ensure the “pillowy” result.
- Freshness Factor: Like a crispy appetizers from a chinese takeout recipe, these are best served immediately while the steam wisps are still visible.
- Oil Selection: Avoid olive oil. Use a neutral oil with a high smoke point to ensure the flavor of the banana and cinnamon shines through.
Preserving the Warmth: Storing and Reheating
Haitian beignets are best enjoyed fresh, but if you have leftovers, they can be saved. Store them in an airtight container at room temperature for up to 24 hours. To maintain the crispy crust, avoid the microwave, which will make the fermented dough rubbery.
To reheat, place them in an oven or air fryer at 350°F (175°C) for 3-5 minutes. This will revive the golden-brown exterior and bring back that “torn open” steam effect. Re-dust with fresh powdered sugar and cinnamon just before serving to restore the visual appeal.
Caribbean Pairings: What to Serve
While these beignets are a meal on their own, they fit perfectly into a larger breakfast spread. For a balanced morning, pair them with vibrant breakfast smoothies that cut through the richness of the fried dough.
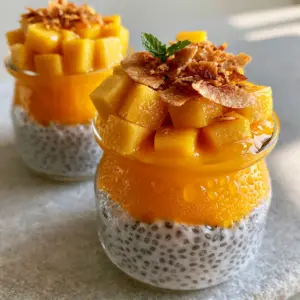
If you prefer a textured contrast, serve them alongside a bowl of creamy mango coconut chia pudding. The tropical flavors of mango and coconut complement the banana base of the beignets beautifully. For those looking for more international fried favorites, these share a similar comfort-food DNA with lebanese spicy potatoes, which also focus on a perfect crispy exterior.
Frequently Asked Questions
While you can use baking powder for a quicker version, you will lose the signature airy honeycomb interior and complex fermented flavor. Yeast is essential for the specific ‘pillowy’ texture seen in authentic Haitian recipes.
Yes, but thaw them completely and drain any excess liquid before mashing. The extra moisture in frozen bananas can make the dough too wet, so you may need to adjust the flour slightly.
Ensure your oil is deep enough (at least 2-3 inches) and maintained at 350°F. The dough should float and expand. If it’s too thin, add a tablespoon more flour to provide more structural support.
Haitian beignets (Benye) are primarily made with a base of mashed overripe bananas and a fermented dough, resulting in a fruitier flavor and a more irregular honeycomb interior compared to the uniform, doughy texture of French-style beignets.
This usually happens if the oil is too hot (above 375°F). The high sugar content in the bananas causes the exterior to brown rapidly. Use a thermometer to keep the oil at a steady 350°F for even cooking.
Haitian Beignets: The Full Recipe Card
Haitian Beignets: The Ultimate Recipe for Crispy, Airy Banana Fritters
Ingredients
Equipment
Method
- Combine warm water and 1 tsp sugar; sprinkle yeast over and let foam for 10 minutes.
- Mash bananas with remaining sugar, salt, and spices. Fold in yeast mixture and flour until a thick, sticky dough forms.
- Cover and let rise in a warm spot for 1-2 hours until doubled and bubbly on top.
- Heat oil to 350°F (175°C). Drop 2-tbsp portions into oil. Fry until deep golden-brown (2-3 mins per side).
- Drain on a wire rack. Dust with a fine mist of powdered sugar and a pinch of cinnamon while hot.
Notes
Use a neutral oil like vegetable or canola for the cleanest taste.
The Magic of Authentic Haitian Flavors
There is nothing quite like the satisfaction of tearing into a warm beignet and seeing those steam wisps rise. This recipe brings the authentic taste of Haiti into your kitchen, combining simple ingredients with the sophisticated science of fermentation. Whether you are serving these for a weekend brunch or a late-night treat, they are guaranteed to impress with their professional texture and deep, banana-infused flavor.
If you enjoyed this recipe, please leave a comment below and let me know how your honeycomb interior turned out! Don’t forget to share your photos and tag me. For more visual inspiration and recipe pins, follow me on Pinterest and save this to your favorite Caribbean Food board!