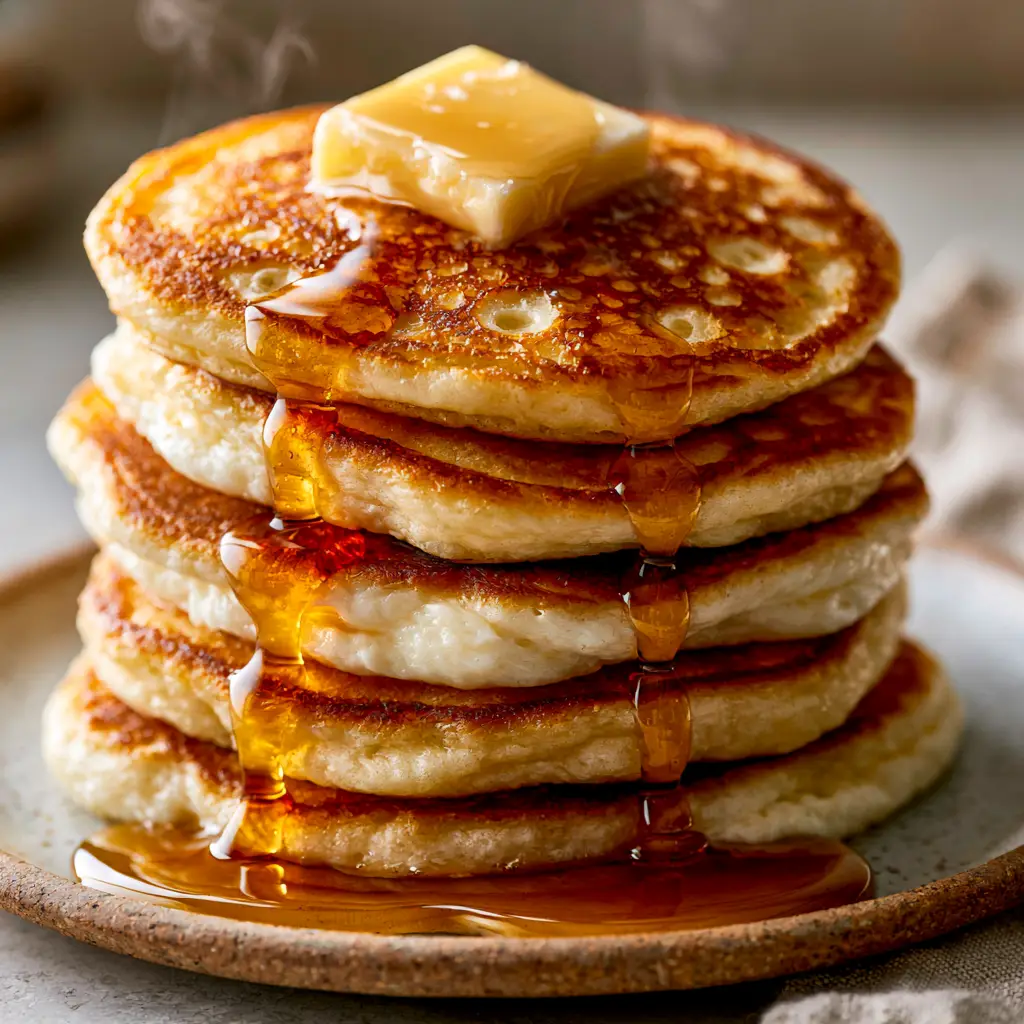
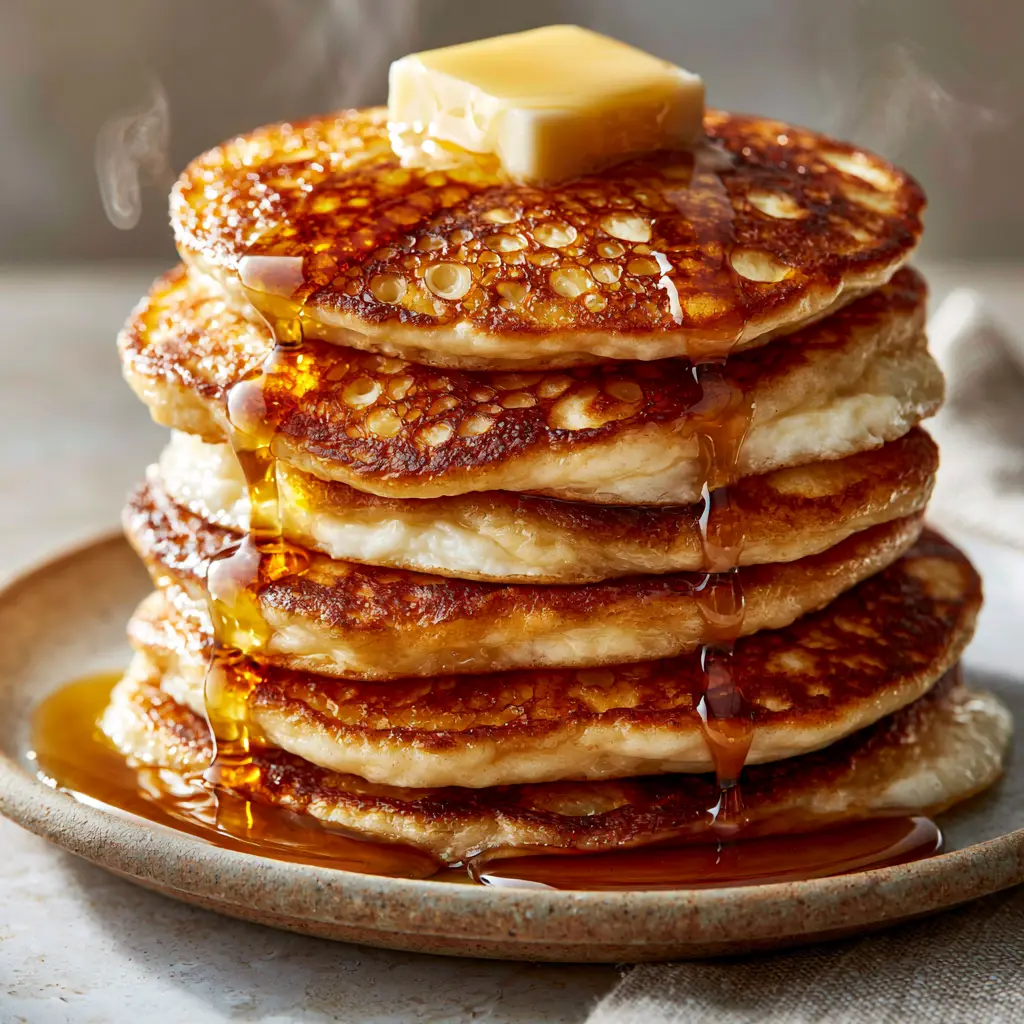
There is nothing quite like waking up to a towering stack of Classic Pancakes, each one measuring a full inch in height with a soft, pillowy white interior. These aren’t your average flat flapjacks; we are crafting an architectural masterpiece of breakfast engineering that features a distinct lacy, golden-brown griddle crust and porous, airy sides that practically beg to soak up syrup.
Imagine a stack of five exceptionally thick rounds, resting on a rustic matte ceramic plate while a thick square of salted butter slowly loses its form, cascading down the sides. As you pour viscous, translucent amber maple syrup over the top, it catches the morning light, pooling richly at the base while soft wisps of steam rise into the air. This recipe is designed to bridge the gap between professional food photography and your home kitchen.
To achieve this specific visual and textural result, we focus on the chemistry of leavening and the physics of the griddle. By following this guide, you will master the art of the “lacy edge”—that crispy, buttery perimeter that provides the perfect structural contrast to the cloud-like center. Whether you are pairing these with vibrant breakfast smoothie recipes or serving them as a standalone feast, these pancakes set the standard for excellence.
Why This Specific 5-Stack Formula Works
- Exceptional Vertical Height: We utilize a specific ratio of leavening agents to flour, ensuring each pancake hits that coveted 1-inch thickness without becoming dense or “bread-like.”
- The Lacy Griddle Crust: By using a combination of high-fat buttermilk and a precise frying technique, we create a fractal-like golden crust that offers a delicate crunch.
- Porous Interior Architecture: The “airy sides” mentioned in our visual blueprint are achieved through a strictly controlled mixing process that preserves carbon dioxide bubbles.
- Syrup Absorption Capacity: The crumb structure is engineered to hold viscous maple syrup without becoming soggy, maintaining its integrity from the first bite to the last.
Essential Components for the Ultimate Fluffy Stack
All-Purpose Flour: 2 cups (250g). The structural foundation of our Classic Pancakes, providing enough protein to hold the height while remaining tender. Using a scale for grams ensures your stack doesn’t turn out heavy.
Full-Fat Buttermilk: 2 cups (480ml). The acid in buttermilk reacts with our leavening agents to create massive lift and that signature tangy depth. If you enjoy rich flavors, you might also love the decadence found in a lemon butter sauce.
Granulated Sugar: 2 tbsp (25g). Beyond sweetness, sugar aids in the Maillard reaction, which is responsible for that “golden-brown lacy crust” we see in the visual blueprint. It also helps tenderize the gluten strands.
Baking Powder: 2 tsp (10g) & Baking Soda: 1 tsp (5g). This dual-leavening approach provides both immediate lift and sustained rising power as the batter hits the heat of the griddle. This is the secret to the 1-inch thickness.
Melted Unsalted Butter: 4 tbsp (56g). Fat is the vehicle for flavor and contributes to the “soft, pillowy white interior.” We use unsalted to control the seasoning precisely.
Large Eggs: 2 units. Eggs provide the necessary emulsifiers to bind the fats and liquids, while the proteins set quickly to lock in the airy, porous structure of the sides.
Fine Sea Salt: ½ tsp (3g). A critical “invisible” ingredient that sharpens the flavor of the butter and syrup, preventing the stack from tasting one-dimensionally sweet.
The Culinary Toolbox for Precision Griddling
To achieve the side-profile close-up perfection seen in our visual guide, you need a heavy-bottomed cast iron griddle or a high-quality non-stick pan. The heavy base ensures even heat distribution, which is vital for that uniform golden-brown color across all five pancakes.
You will also need a wide, thin offset spatula. This allows you to flip the thick, 1-inch rounds without deflating the air bubbles that create the porous sides. A standard wire whisk and two glass mixing bowls are required to keep your wet and dry ingredients separate until the final moment of activation.
The Blueprint to a Perfect Golden-Brown Crust
Phase 1: The Dry Aeration
In a large mixing bowl, sift together your flour, sugar, salt, baking powder, and baking soda. Sifting is not optional here; it breaks up clumps and pre-aerates the flour, which is essential for achieving the “pillowy white interior” visible at the edges of the stack.
Phase 2: The Emulsion
In a separate vessel, whisk your buttermilk and eggs until no streaks of yolk remain. Slowly pour in the melted butter while whisking constantly. This creates a stable emulsion that ensures every square inch of the pancake has a consistent texture and flavor profile.
Phase 3: The Gentle Fold
Make a well in the center of the dry ingredients and pour in the liquid mixture. Using a spatula, fold the ingredients together until just combined. Stop as soon as the flour streaks disappear—lumps are your friends here, as they indicate the gluten hasn’t been overworked, preserving the airy sides.
Phase 4: The Resting Period (Crucial Step)
Allow the batter to rest for 10 minutes at room temperature. You will actually see the bubbles forming on the surface as the baking soda reacts with the buttermilk. This rest period allows the starch granules to hydrate, leading to a more stable rise and that impressive 1-inch vertical height.
Phase 5: Achieving the Lacy Crust
Heat your griddle over medium heat. Lightly coat the surface with a thin layer of butter. When a drop of water sizzles and dances on the surface, pour ½ cup (120ml) of batter per pancake. Look for the sensory cue: bubbles will form on the surface and the edges will begin to look set and “lacy.”
Phase 6: The Flip and Finish
Carefully slide your spatula under the pancake and flip in one fluid motion. Cook for another 2 minutes until the side-profile shows a beautiful golden-brown crust on both sides with a soft, white center. Stack five high on a matte ceramic plate, top with a square pat of salted butter, and pour over your viscous amber maple syrup.
Expert Tips for Pancake Forensics
- Temperature Control: If your pancakes are browning too fast but remain raw in the middle, drop your heat by 15%. A slow, steady heat is required to cook through a 1-inch thick pancake.
- The Butter Trick: For the “melting yellow butter square” look, place the butter on the pancakes while they are steaming hot, then wait 30 seconds before adding syrup to let the butter partially liquefy.
- Avoid the Press: Never press down on the pancake with your spatula. This destroys the porous, airy sides and turns a pillowy pancake into a dense disc.
How to Store and Revive Your Stacks
While Classic Pancakes are best served with “soft steam rising,” you can store leftovers in an airtight container in the refrigerator for up to 3 days. To maintain the lacy crust, reheat them in a toaster oven at 350°F (175°C) rather than the microwave, which can make them rubbery.
For long-term storage, flash-freeze individual pancakes on a baking sheet before transferring them to a freezer bag. They will stay fresh for up to 2 months. Simply pop them into a toaster for a quick weekday breakfast that rivals a fresh Sunday stack.
What to Serve With Classic Pancakes
A heavy stack of five pancakes benefits from a bright, acidic pairing. Consider serving these alongside a fresh fruit platter or even a strawberry shortcake dip for a fun, dessert-inspired brunch. The sweetness of the syrup also pairs beautifully with salty proteins like thick-cut bacon or sausage.
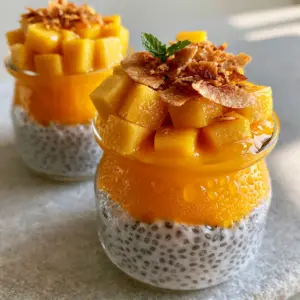
If you are looking for a lighter accompaniment, a mango coconut chia pudding provides a tropical contrast to the rich, buttery notes of the griddle crust. For a savory twist on a weekend brunch, these pancakes can even serve as a side to lebanese spicy potatoes.
Common Questions About Thick Buttermilk Pancakes
You can, but the pancakes won’t be as thick. The acidity in buttermilk reacts with baking soda to create the 1-inch lift. If using milk, add 1 tablespoon of lemon juice per cup of milk.
The ‘lacy’ crust is achieved by using a generous amount of butter on a hot griddle. The fat fries the edges of the batter, creating a delicate, crispy texture.
Medium heat (about 350°F/175°C) is ideal. It allows the 1-inch interior to cook through completely without burning the golden-brown exterior crust.
Pancakes often turn out flat due to overmixing the batter, which develops gluten, or using expired baking powder. Ensure you fold the ingredients gently and let the batter rest for 10 minutes.
A porous, airy interior is designed to absorb syrup. If you prefer it to pool, ensure the pancakes have cooled slightly so the syrup doesn’t thin out immediately upon contact.
The Definitive Classic Pancakes Recipe
Classic Pancakes: The Secret to 1-Inch Thick Fluffy Buttermilk Stacks
Ingredients
Equipment
Method
- In a large bowl, sift together the flour, sugar, baking powder, baking soda, and salt to ensure no lumps and maximum aeration.
- In a separate bowl, whisk the buttermilk and eggs until smooth, then slowly stream in the melted butter while whisking.
- Fold the wet ingredients into the dry until just combined. Let the batter rest for 10 minutes to activate the leavening agents.
- Preheat a griddle over medium heat and lightly grease with butter until it sizzles.
- Pour 1/2 cup of batter onto the griddle. Cook until a lacy golden-brown crust forms on the bottom and bubbles appear on the surface.
- Flip carefully and cook for 2 more minutes. Stack five high and top with a butter square and maple syrup.
Notes
Use a cast iron surface for the best lacy crust texture.
Closing & Call to Action
Mastering these Classic Pancakes is a rite of passage for any home cook. The combination of the 1-inch height, the lacy golden-brown crust, and the viscous amber syrup creates a sensory experience that is as beautiful as it is delicious. If you enjoyed this recipe, please leave a comment below and share your results! Don’t forget to follow katieplates on Pinterest and save this recipe to your breakfast board for later.