There is nothing quite like the first bite of a perfectly executed Lobster Rolls masterpiece. The contrast between the warm, griddled brioche and the succulent, chilled lobster meat creates a sensory experience that defines luxury summer dining. Whether you are sitting on a weathered wood dock or in your own kitchen, this recipe brings that authentic coastal vibe directly to your plate.
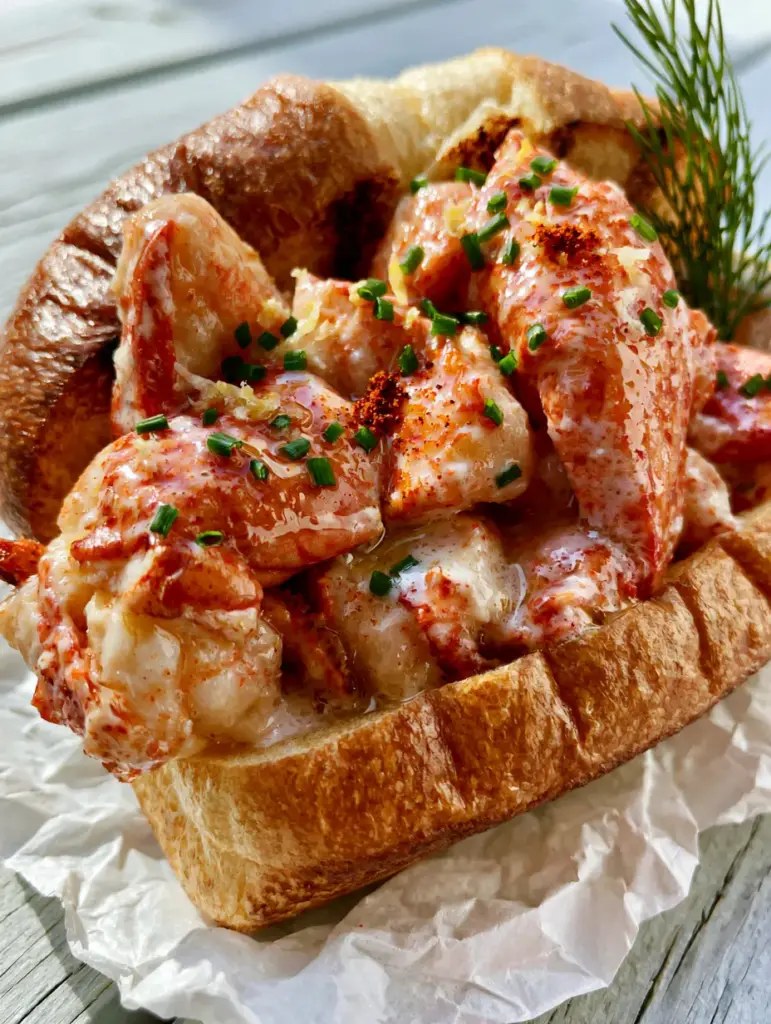
Achieving the visual and culinary excellence of a premium lobster roll requires more than just high-quality seafood. It is about the interplay of textures: the buttery sheen of a toasted bun and the glistening moisture of lobster claw meat dusted with vibrant paprika. This guide will walk you through every scientific detail to ensure your results match the professional photography every single time.
Every element in this recipe is designed to mirror the “Visual Recipe Blueprint”—from the finely minced chives to the delicate lemon zest. We are skipping the fluff and diving deep into the culinary mechanics of the perfect split-top roll. Prepare to elevate your holiday celebration with a dish that looks as incredible as it tastes.
Why This Recipe Defines the Gold Standard for Lobster Rolls
- The Perfect Temperature Contrast: We utilize the traditional Maine-style approach with chilled lobster meat against a hot, toasted bun for maximum impact.
- Textural Harmony: Large, succulent chunks of claw and knuckle meat provide a meaty bite that outshines shredded alternatives.
- Visual Precision: From the light paprika dusting to the fresh dill sprigs, this dish is styled for high-end food photography.
- Enhanced Flavor Profile: A hybrid dressing approach uses a light creamy base supplemented by a decadent melted butter glaze for the ultimate “best of both worlds” flavor.
Sourcing Your Ingredients for Maximum Flavor and Visual Appeal
Lobster Claw and Knuckle Meat: You will need 1.5 lbs (680g) of high-quality lobster meat. Claw and knuckle meat are preferred for their tenderness and the iconic “massive, succulent chunks” visual described in our blueprint.
Split-Top Brioche Buns: These are essential for achieving those visible grill marks and the golden-brown foundation. The high egg and butter content in brioche allows for superior caramelization compared to standard white bread.
Unsalted Butter: Use 4 tbsp (56g) of high-quality European-style butter for the glaze. The higher fat content creates a more intense buttery sheen on both the lobster and the bun.
Kewpie or Heavy-Duty Mayonnaise: 3 tbsp (45g) of mayo acts as a binder. It should be “light” as per the prompt to ensure the lobster remains the star of the show without becoming heavy or gloopy.
Fresh Herbs (Chives and Dill): 2 tbsp (8g) of minced fresh chives and several fresh dill sprigs provide the necessary pop of green. Chives add a mild onion note, while dill offers a clean, herbaceous finish.
Aromatics and Spices: You will need the zest of one organic lemon and a tiny pinch of smoked paprika. The paprika adds a “light dusting” of color and a subtle earthy undertone that complements the sweetness of the meat.
Essential Equipment for Professional Results
To achieve the “handheld smartphone photo” quality of our visual prompt, you need the right tools. A heavy-bottomed cast iron skillet or a griddle is non-negotiable for creating those distinct grill marks on the brioche. A sharp microplane is required for the lemon zest to ensure it is fine enough to cling to the butter glaze without adding bitterness.
You will also need a set of stainless steel mixing bowls kept in the refrigerator. Keeping your lobster meat and dressing components cold during the mixing process is a professional secret for maintaining the “chilled lobster” integrity. Finally, grab some white parchment paper; crumpling it under the rolls creates the authentic, rustic texture seen in high-end food photography.
The Culinary Science of the Perfect Lobster Roll
Step 1: Preparing the Chilled Lobster Foundation
If starting with whole lobsters, steam them for approximately 8–10 minutes until the shells are bright red. Immediately plunge them into an ice bath to stop the cooking process; this prevents the meat from becoming rubbery. Once cooled, carefully extract the claw and knuckle meat, keeping the pieces as large as possible.
Pat the lobster meat extremely dry with paper towels. Any excess moisture will dilute the dressing and prevent the “glistening” look we want to achieve. Place the meat in a chilled bowl and set aside in the refrigerator while you prepare the remaining components.
Step 2: Crafting the Hybrid Creamy Dressing
In a small bowl, whisk together 3 tbsp (45g) of mayonnaise, 1 tsp (5ml) of fresh lemon juice, and a pinch of fine sea salt. This creates a “hint of creamy dressing” that coats the meat without drowning it. Stir in half of your minced chives to distribute flavor throughout the mixture.
Gently fold the chilled lobster chunks into the dressing using a rubber spatula. You want to see the pink and white of the meat through the translucent coating. Return this mixture to the fridge to keep it cold until the exact moment of assembly.
Step 3: Griddling the Brioche for Maximum Crunch
Heat your skillet over medium heat. Generously brush the flat sides of your split-top brioche buns with 1 tbsp (14g) of melted butter. This is the foundational invisible ingredient that facilitates the Maillard reaction, resulting in that “golden-brown” finish.
Place the buns side-down on the skillet and press lightly. Toast for 1-2 minutes until visible grill marks appear and the edges are crisp. The interior should remain soft, creating a textural contrast with the crunch of the toasted sides. Repeat for all rolls.
Step 4: The Final Assembly and Visual Styling
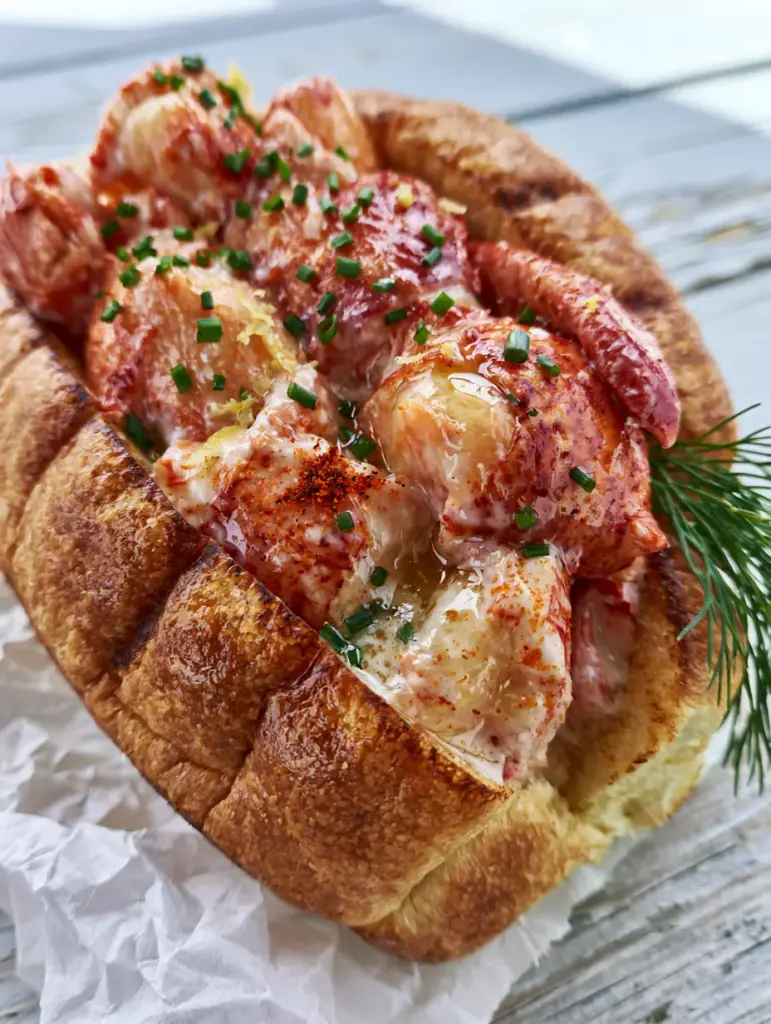
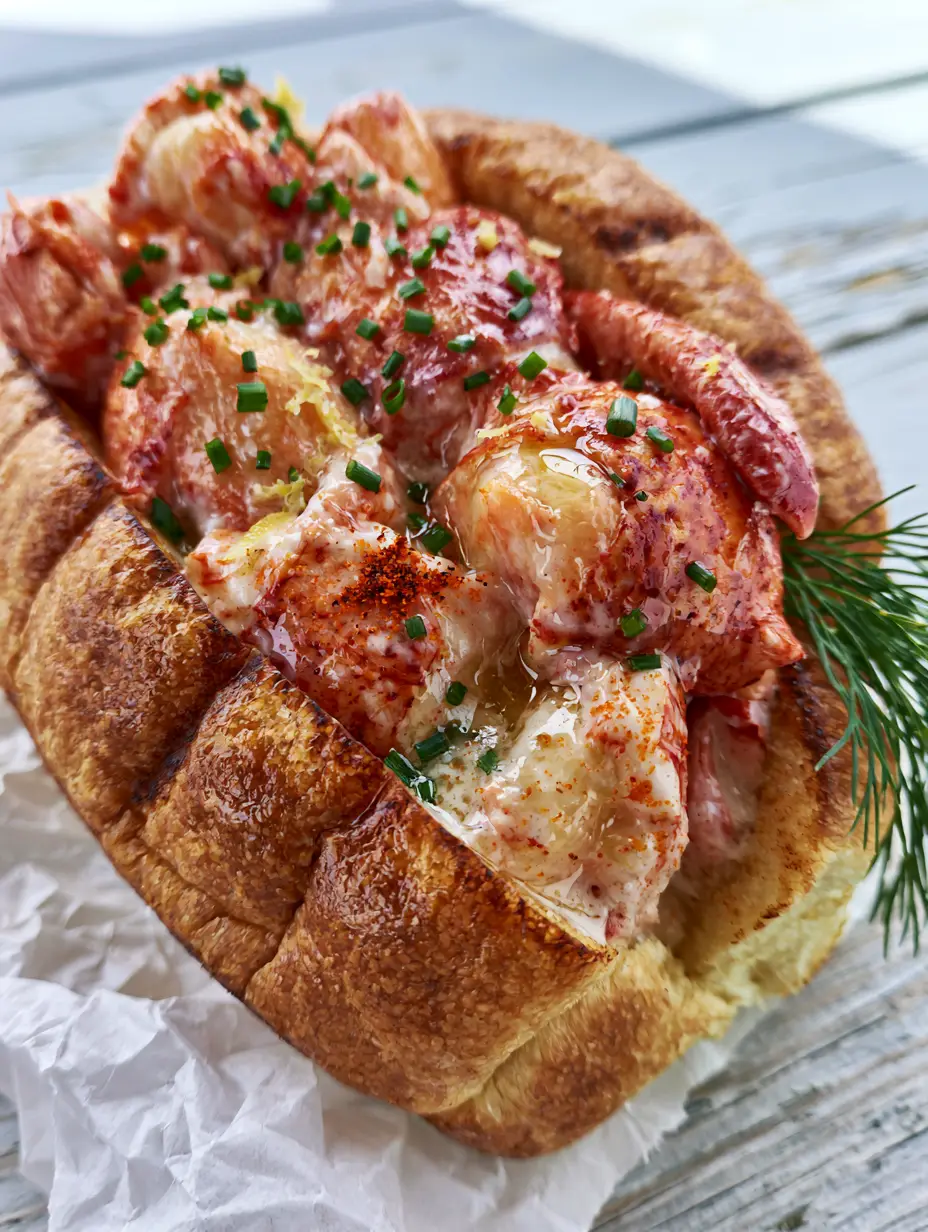
Carefully open the toasted buns and divide the chilled lobster mixture evenly among them. To achieve the “premium” look, place the largest claw pieces on top so they are prominently visible. This is where the dish truly begins to look like our favorite seafood classics.
Drizzle the remaining 2 tbsp (28g) of melted butter glaze directly over the lobster meat. This creates the “buttery sheen” and “moisture” highlights mentioned in the visual prompt. Immediately sprinkle with the remaining minced chives, the lemon zest, and that crucial tiny pinch of smoked paprika.
Expert Tips for Success from a Professional Kitchen
- The “Dry-Pat” Rule: Never skip drying your lobster. If the meat is wet, the butter glaze will slide off rather than clinging to the surface.
- Butter Temperature: Ensure your glaze is warm but not boiling. Boiling butter can “cook” the delicate dressing, causing it to break and become oily.
- Zest Technique: Only zest the yellow part of the lemon. The white pith is bitter and will ruin the delicate balance of the lobster.
- Bun Integrity: Use “top-split” buns rather than side-cut. Top-split buns hold more filling and provide a more stable base for the “massive chunks” of meat.
What to Serve With Your Lobster Rolls
These rolls are the centerpiece of a perfect summer meal. For a full coastal experience, pair them with other seafood favorites for a family-style spread. If you’re looking for something refreshing, a tropical smoothie or a cold glass of crisp white wine provides the perfect acidity to cut through the rich butter.
For a side dish that matches the rustic aesthetic, consider crispy fries or a light cucumber salad. If you’re hosting a picnic, don’t forget a jar of homemade jam and some fresh bread for a sweet finish to your afternoon feast.
Storage and Reheating Advice
Lobster Rolls are best consumed immediately to maintain the temperature contrast between the hot bun and cold meat. However, if you have leftovers, store the lobster salad and the buns separately. The lobster salad will keep in an airtight container in the refrigerator for up to 2 days.
Do not freeze the assembled rolls or the lobster salad, as the mayonnaise will separate and the lobster texture will become grainy. To “reheat,” simply toast a fresh bun and fill it with the chilled leftover meat for a quick and decadent lunch the next day.
Frequently Asked Questions
Yes, you can use high-quality frozen lobster meat. Ensure it is fully thawed in the refrigerator and patted extremely dry to prevent the roll from becoming soggy.
Use a preheated cast iron skillet or griddle and press the buttered bun down firmly but gently for about 60-90 seconds.
Maine style features chilled lobster meat tossed in a light mayonnaise dressing, while Connecticut style serves the lobster warm and drenched in melted butter. This recipe uses a hybrid approach for maximum flavor.
Claw and knuckle meat are the gold standard for rolls because they are the most tender and come in large, visually appealing chunks.
Split-top buns have flat, exposed sides that are perfect for griddling. This allows for even browning and a stable structure to hold the heavy lobster meat.
The Ultimate Lobster Rolls Recipe
Lobster Rolls: The Ultimate Guide to Crafting the Perfect Coastal Classic
Ingredients
Equipment
Method
- Pat the chilled lobster meat extremely dry with paper towels to ensure the butter glaze adheres properly.
- In a chilled bowl, whisk mayonnaise, lemon juice, and half the chives. Gently fold in the lobster chunks.
- Brush brioche buns with butter and griddle on a skillet over medium heat until golden-brown grill marks appear.
- Stuff buns with lobster salad, drizzle with melted butter glaze, and top with remaining chives, lemon zest, paprika, and a sprig of dill.
Notes
Use a top-split bun to ensure the roll doesn't fall apart under the weight of the lobster chunks.
Closing & Call to Action
Mastering the art of the perfect Lobster Rolls is a rite of passage for any home cook who loves the sea. By focusing on the visual cues—the golden brioche, the glistening meat, and the vibrant herb garnishes—you create more than just a meal; you create an experience. This recipe ensures that every bite is a perfect balance of buttery richness and coastal freshness.
If you enjoyed this deep dive into seafood excellence, please leave a comment below and share your results! For more culinary inspiration and high-RPM recipes, be sure to follow us on Pinterest. Happy cooking!