There is nothing quite as visually arresting or culinarily satisfying as a perfectly executed plate of seared ahi tuna. The contrast between the crunch of a toasted sesame crust and the buttery, ruby-red rare center is a hallmark of high-end seafood dining that you can master at home.
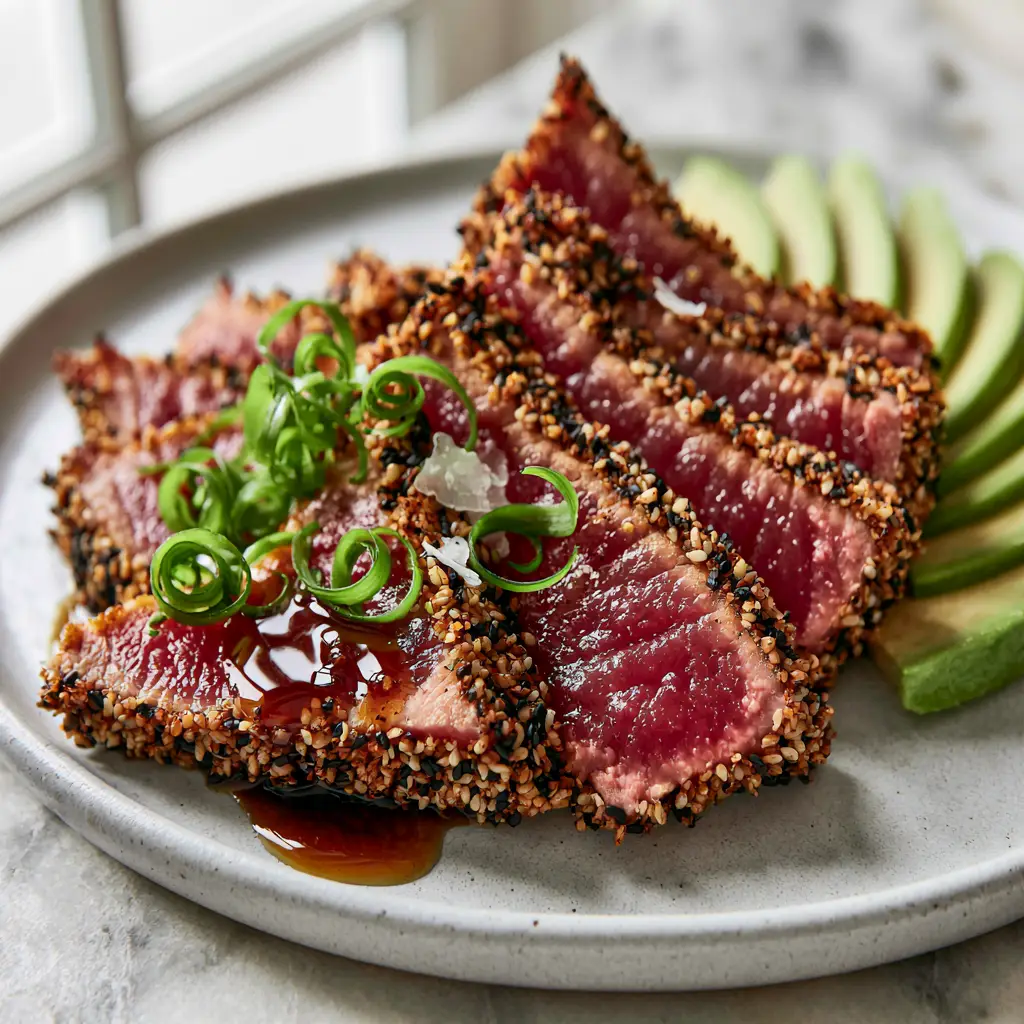
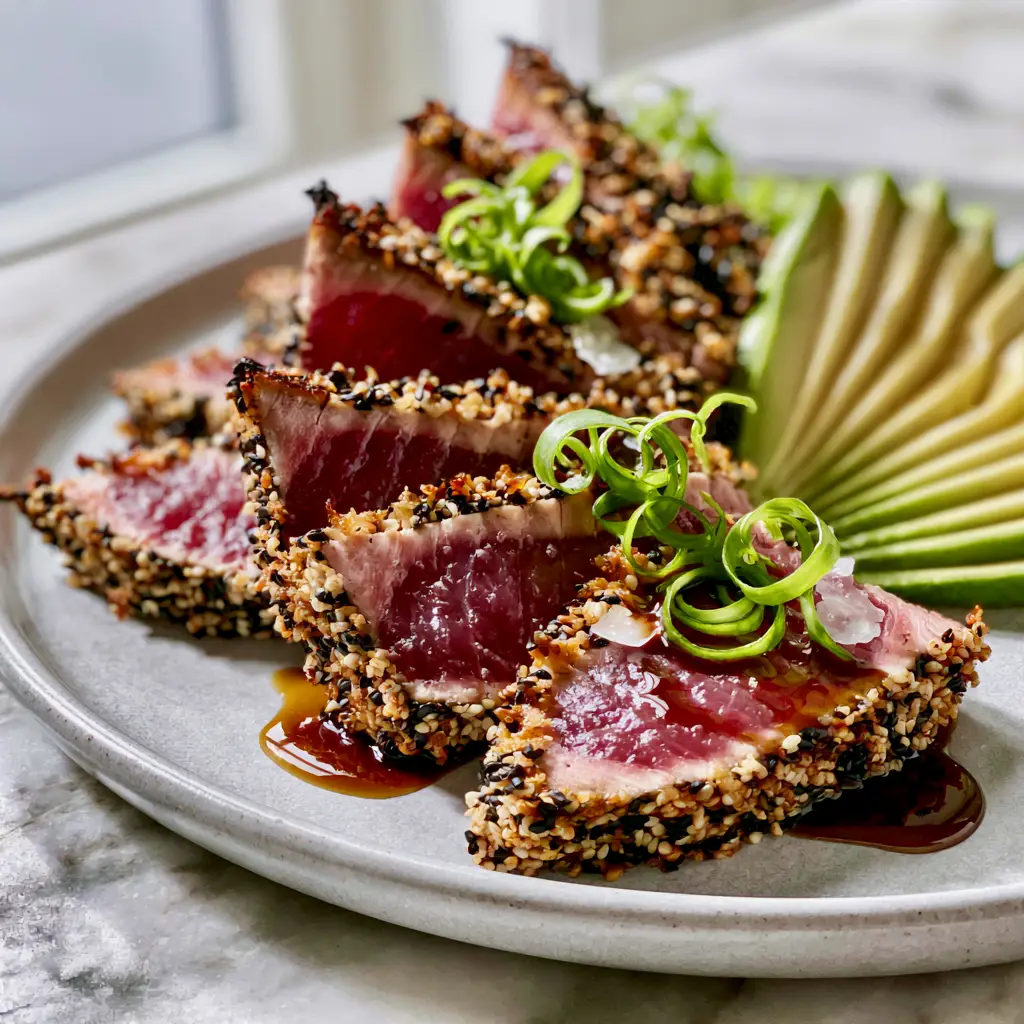
This recipe focuses on achieving that precise 2mm seared edge seen in professional kitchens, transitioning instantly into a vibrant, melt-in-your-mouth interior. Set against a minimalist light gray ceramic plate, the colors of the tuna and the bright green curled scallions create a masterpiece of modern plating.
By following a few forensic culinary techniques—like ensuring a moisture-free surface and using high-precision heat—you will transform a simple tuna steak into a five-star experience. The addition of a glossy dark amber soy-ginger reduction provides the perfect hit of umami to tie the dish together.
Why You Will Love This Restaurant-Quality Seafood Dish
- Sensory Contrast: You get a thick, crunchy exterior from the toasted black and white sesame seeds paired with a “buttery” rare center.
- Speed and Elegance: This sophisticated meal goes from the fridge to the table in under 20 minutes, making it perfect for impressive weeknight dinners.
- Visual Brilliance: The vibrant ruby-red tuna, fanned out next to creamy ripe avocado, creates a plate that looks like it belongs in a culinary magazine.
- Nutrient Dense: High in lean protein and healthy fats, it is a healthy alternative to traditional Chinese takeout recipe favorites.
Essential Components for the Perfect Sesame Crust
Ahi Tuna Steaks (Sashimi-Grade): You must use high-quality, sashimi-grade tuna to ensure it is safe and delicious to eat rare. Look for deep red steaks with minimal connective tissue for the best texture.
Black and White Sesame Seeds: A 50/50 blend provides the iconic “salt and pepper” visual contrast and a deep, nutty flavor when toasted. They also provide the structural crunch that protects the delicate fish during the sear.
Toasted Sesame Oil: This oil has a lower smoke point but incredible aromatics; we use a small amount (1 tbsp (15ml)) to provide a glossy sheen and deep toasted flavor. It acts as the “glue” for our crust while adding a luxurious mouthfeel.
Avocado: One ripe avocado, thinly sliced and fanned out, provides a creamy green contrast to the lean tuna. It balances the saltiness of the glaze with its natural, mild fattiness.
Maldon Sea Salt Flakes: These large, crunchy flakes are used as a finishing touch to provide “pop” and enhance the natural sweetness of the tuna. Unlike table salt, they don’t dissolve immediately, maintaining their crystalline structure on the plate.
Professional Tools for a Precision Sear
To achieve that thin 2mm sear, a heavy-bottomed cast iron skillet or high-quality stainless steel pan is non-negotiable. These materials retain heat efficiently, ensuring the seeds toast quickly before the heat can penetrate the center of the fish.
You will also need an exceptionally sharp chef’s knife or a slicing knife to fan out the tuna slices. A dull blade will tear the delicate rare center rather than creating the clean, smooth edges seen in our visual guide.
Mastering the 10-Minute Soy-Ginger Reduction
Preparing the Glossy Dark Amber Base
In a small saucepan over medium heat, combine 1/4 cup (60ml) soy sauce, 1 tbsp (15g) grated fresh ginger, and 1 tbsp (15g) honey or brown sugar. Whisk constantly until the mixture begins to bubble and the sugar has completely dissolved.
Simmer the liquid for 5-7 minutes until it reduces by half, becoming thick enough to coat the back of a spoon. This creates that glossy dark amber drizzle that provides a sweet-and-salty “punch” to the dish, much like a high-end teriyaki chicken glaze.
How to Achieve the Perfect Seared Ahi Tuna
Step 1: The Scallion Curl Technique
Before you touch the fish, finely slice your scallions on a sharp diagonal. Place them into a bowl of ice-cold water for 10 minutes; this causes them to “curl” into the elegant, bright green garnishes seen in our recipe blueprint.
Step 2: Prepping the Sesame Crust
Pat your tuna steaks completely dry with paper towels; moisture is the enemy of a good sear. Brush each side with a thin layer of toasted sesame oil, then press the steaks firmly into a plate of mixed black and white sesame seeds until fully encrusted.
Step 3: The 45-Second Flash Sear
Heat your skillet over high heat until a drop of water sizzles and evaporates instantly. Add 1 tbsp (15ml) of high-smoke point neutral oil and wait for wisps of smoke to appear. Place the tuna in the pan and sear for exactly 45-60 seconds per side.
You are looking for a visual cue: the very edge of the tuna will turn from red to opaque gray, moving only 2mm up the side of the steak. Remove the tuna immediately to a cutting board to rest for 2 minutes before slicing.
Expert Tips for Culinary Success
- Temperature Control: Ensure your tuna is cold when it hits the pan; this helps maintain that “ruby-red” center while the outside sears.
- Pressure is Key: When crusting the tuna, press down firmly so the sesame seeds embed into the flesh, preventing them from falling off in the skillet.
- Resting Period: Do not slice the tuna immediately. Resting allows the juices to redistribute, ensuring the vibrant red center stays moist and “buttery.”
- Slicing Technique: Use a long, single drawing motion with your knife rather than a sawing motion to get those perfectly fanned slices.
What to Serve with Your Seared Tuna
This dish is exceptionally light, so it pairs well with vibrant side dishes. You might consider serving it alongside a fresh avocado tuna salad for a double-tuna feast or even some lebanese spicy potatoes for a spicy, textured contrast.
If you are looking for a complete Asian-inspired spread, this tuna is a fantastic starter for a meal featuring dan dan noodles or a light vegetable stir-fry. The soy-ginger glaze also works beautifully if you have leftovers to drizzle over baked salmon with lemon butter cream sauce.
Frequently Asked Questions
Yes! The glaze can be made up to a week in advance and stored in the refrigerator. Just gently reheat it or bring it to room temperature before drizzling to ensure it has a glossy, pourable consistency.
First, pat the tuna completely dry with paper towels. Brush a thin layer of toasted sesame oil or a flavorless oil onto the fish; this acts as a ‘glue’ for the seeds before you press them firmly into the crust mixture.
For a standard 1.5-inch thick steak, sear for 45 to 60 seconds per side in a smoking hot pan. This creates a 2mm opaque edge while keeping the majority of the center vibrant and rare.
You should always look for ‘Sashimi-Grade’ or ‘Sushi-Grade’ Ahi (Yellowfin) or Bigeye tuna. This ensures the fish has been handled properly for safe raw consumption, which is essential since the center remains rare.
This usually happens if the pan wasn’t hot enough or the fish was cooked for too long. To prevent this, ensure your skillet is smoking hot so the crust forms instantly without the heat reaching the core of the steak.
The Ultimate Seared Ahi Tuna Recipe
Seared Ahi Tuna with a Toasted Sesame Crust and Soy-Ginger Glaze
Ingredients
Equipment
Method
- Finely slice scallions on a bias and soak in ice water for 10 minutes until they curl. Drain and set aside.
- Simmer soy sauce, ginger, and honey in a saucepan over medium heat for 5-7 minutes until thick and glossy. Set aside.
- Pat tuna steaks dry. Brush with sesame oil and press firmly into the mixed sesame seeds until all sides are coated.
- Heat a skillet over high heat with a splash of oil. Sear tuna for 45-60 seconds per side until a 2mm white edge appears.
- Rest for 2 minutes, then slice into 1/2 inch pieces. Fan out on a plate with avocado, drizzle with glaze, and top with Maldon salt and scallions.
Notes
Use sashimi-grade fish only as the center will remain rare.
Closing & Call to Action
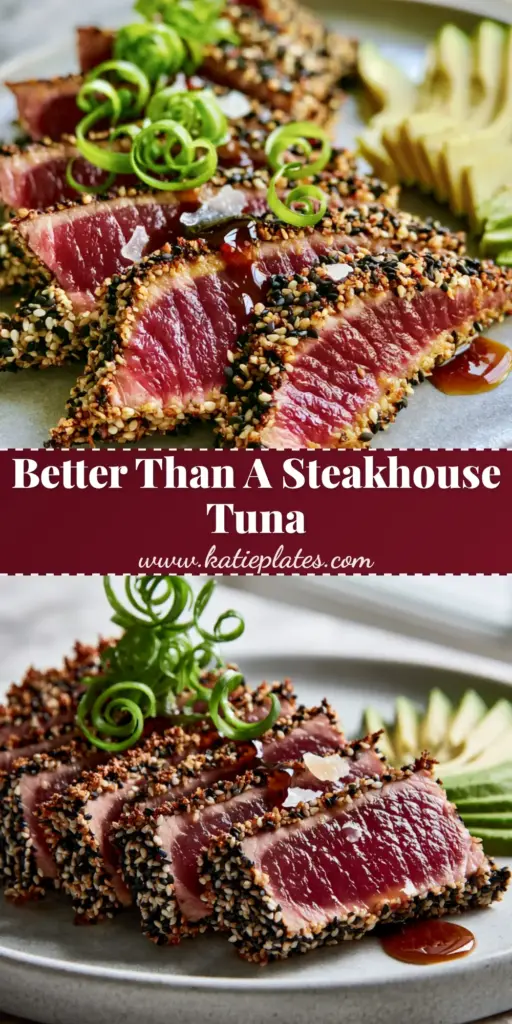
Mastering the seared ahi tuna is a rite of passage for any home cook looking to elevate their seafood game. The combination of the crunchy sesame crust, the zingy soy-ginger glaze, and the creamy avocado creates a balanced plate that is as healthy as it is beautiful.
If you enjoyed this recipe, please leave a comment below and let us know how your sear turned out! Don’t forget to follow us on Pinterest and share your creations with our community.