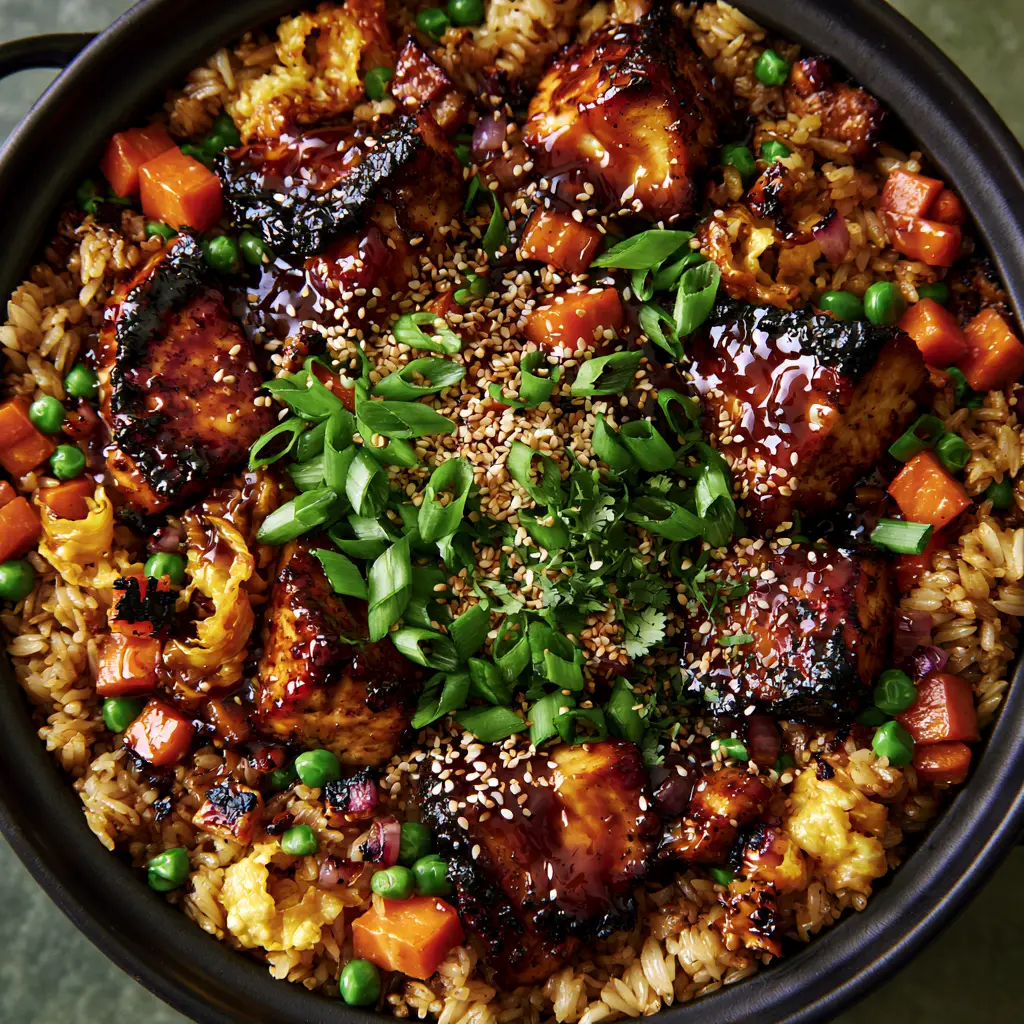
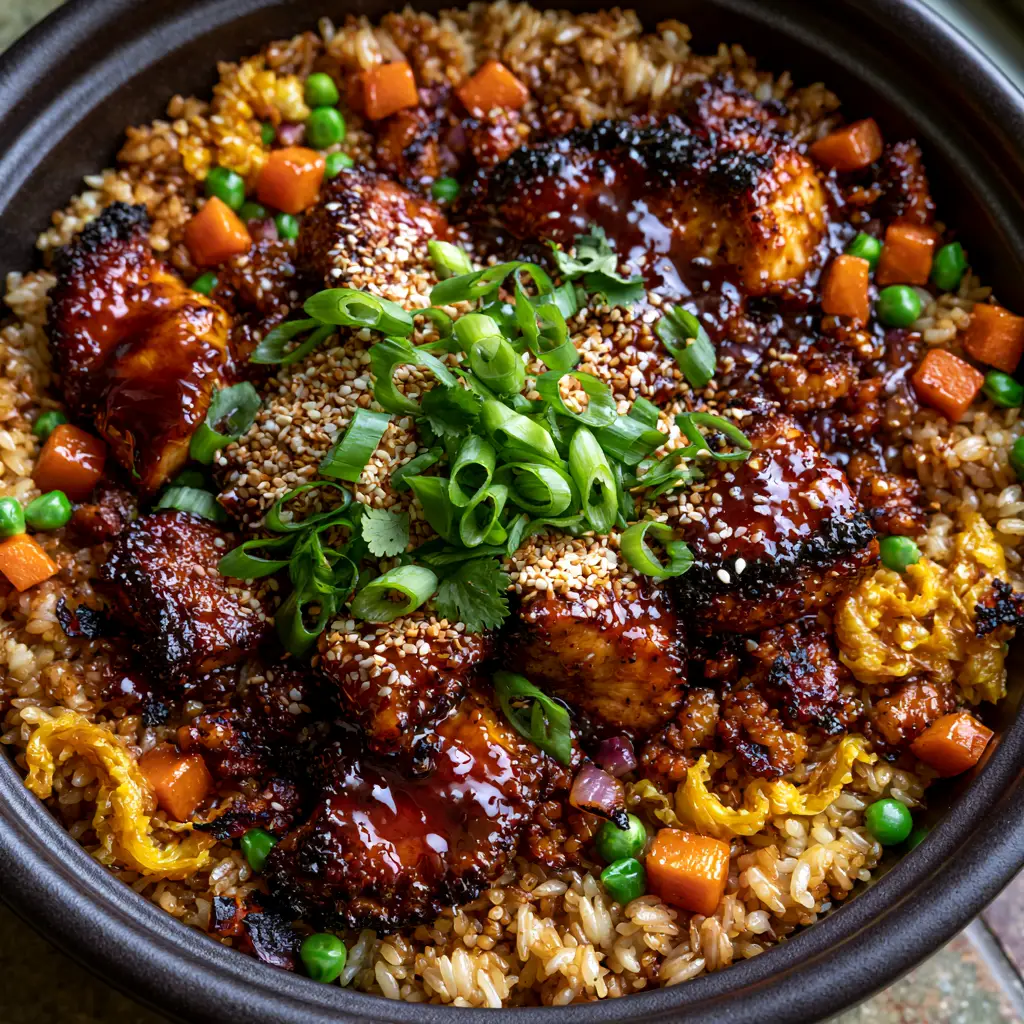
Imagine a shallow matte black ceramic wok resting on your counter, steam rising in swirling plumes from a bed of golden-brown jasmine rice. The aroma of toasted sesame and sweet ginger fills the air, promising a meal that rivals any high-end teppanyaki grill. This teriyaki chicken fried rice is not just a quick weeknight dinner; it is a masterclass in texture and balanced umami flavors.
Every bite offers a contrast between the crispy, charred edges of the chicken and the fluffy, soy-seasoned grains of rice. The vibrant orange carrots and bright garden peas add pops of sweetness, while the ribbons of golden scrambled eggs provide a soft, rich mouthfeel. This recipe bridges the gap between professional culinary technique and the cozy comfort of home cooking.
Whether you are a seasoned home chef or just starting your journey, this dish will become a staple in your rotation. The secret lies in the Maillard reaction—that perfect sear on the chicken breast—and the high-heat “breath of the wok” that transforms simple jasmine rice into a restaurant-quality masterpiece. Let’s dive into the science and soul of this incredible stir-fry.
Why This Teriyaki Chicken Fried Rice Recipe Works Every Single Time
- The Perfect Glaze: A thick, glistening dark amber honey-teriyaki glaze coats every chunk of chicken, providing a sticky, sweet, and savory finish that balances the salty soy rice.
- Visual Contrast: The combination of bright orange carrot cubes, vibrant green peas, and fluffy golden egg ribbons creates a stunning “macro-ready” aesthetic.
- Texture Mapping: By searing the chicken breast at high heat, we achieve caramelized charred edges that provide a satisfying crunch against the tender interior.
- Aromatic Depth: A foundational soy-ginger reduction serves as the flavor backbone, infusing every grain of long-grain jasmine rice with deep, aromatic warmth.
- Professional Garnish: A heavy dusting of toasted white sesame seeds and freshly sliced scallions adds both visual flair and a fresh, pungent bite to finish the dish.
Essential Ingredients for the Ultimate Flavor Profile
Long-Grain Jasmine Rice: 3 cups (600g) of cooked, day-old rice is essential. Dry rice grains fry individually rather than clumping, ensuring that “golden-brown” finish seen in professional shots.
Chicken Breast: 1 lb (450g) of boneless, skinless breast cut into large, uniform chunks. The size ensures the chicken stays juicy while the exterior develops a heavy, glistening amber crust.
Honey-Teriyaki Glaze: A blend of 1/2 cup (120ml) soy sauce, 1/4 cup (60ml) honey, and 1 tbsp (15ml) mirin. This reduction creates the glossy, thick coating that makes the protein stand out against the matte wok.
Aromatic Base (Ginger and Garlic): 1 tbsp (15g) freshly grated ginger and 3 cloves of minced garlic. These “invisible” ingredients are scientifically required to build the aromatic complexity of the soy-ginger reduction.
Vegetable Medley: 1/2 cup (75g) diced carrots and 1/2 cup (75g) frozen garden peas. These provide the bright orange and vibrant green colors that define the visual blueprint of the dish.
Charred Red Onion: 1/2 small red onion (50g), roughly chopped into bits. Searing these until they have blackened edges adds a smoky “wok hei” flavor profile to the entire dish.
Egg Ribbons: 2 large eggs, lightly beaten with a pinch of salt. Cooking these into thin “crepes” and slicing them into ribbons ensures they don’t get lost in the rice.
Invisible Essentials: 2 tbsp (30ml) neutral oil (like grapeseed) for high-heat searing and 1 tsp (5ml) toasted sesame oil for finishing aroma. These fats are the heat-conductors that achieve the charred textures we desire.
Must-Have Equipment for Wok-Style Excellence
To achieve the “handheld smartphone photo” realism described in our visual goals, you need the right tools. A 12-inch (30cm) matte black ceramic wok or a heavy cast-iron skillet is preferred for heat retention. A wide, flat spatula (preferably stainless steel) is necessary for tossing the rice without breaking the grains.
If you enjoy the technique of searing proteins and building complex flavor profiles, you might also enjoy making chicken wonton tacos for your next appetizer night. Much like fried rice, it’s all about the balance of crunch and sauce.
Step-by-Step Instructions: Mastering the Sear and the Stir-Fry
Step 1: Preparing the Soy-Ginger Reduction and Glaze
In a small saucepan over medium heat, combine your soy sauce, honey, mirin, and freshly grated ginger. Simmer for 5-7 minutes until the liquid reduces by a third and becomes a thick, dark amber syrup. This reduction will serve as both the seasoning for the rice and the glistening glaze for the chicken.
Step 2: Crafting the Fluffy Golden Egg Ribbons
Wipe your wok with a paper towel dipped in oil and set over medium heat. Pour in the beaten eggs, swirling the pan to create a very thin, even layer. Once set (about 45 seconds), slide the egg “crepe” onto a cutting board, roll it up, and slice into thin ribbons. Set these aside to be the final golden garnish.
Step 3: The High-Heat Chicken Sear
Increase the heat to high until the wok is slightly smoking. Add 1 tbsp (15ml) of oil, then add the chicken chunks in a single layer. Do not move them for 2 minutes—you are looking for those “caramelized charred edges.” Flip and sear for another 2 minutes. Pour half of your honey-teriyaki reduction over the chicken, tossing quickly until the meat is heavily coated and glistening. Remove chicken from the wok.
Step 4: Charring the Aromatics and Vegetables
Add the remaining oil to the wok. Toss in the red onion bits and diced carrots. Look for the “visual cue” of the onion edges turning black and the carrots becoming tender-crisp. Add the frozen peas and minced garlic, stirring constantly for 60 seconds to release the scent of the garlic without burning it.
Step 5: The Golden Jasmine Rice Transformation
Add the cold jasmine rice to the wok, breaking up any clumps with your spatula. Pour the remaining soy-ginger reduction over the rice. Toss vigorously over high heat for 3-4 minutes. You want to hear the “crackle” of the rice—this indicates the moisture is evaporating and the grains are frying in the seasoned oil.
Step 6: The Final Integration and Garnish
Fold the glazed chicken and egg ribbons back into the rice. Toss once more to distribute the heat. Remove from the heat and transfer to a shallow matte black bowl. Dust heavily with toasted white sesame seeds and a generous sprinkle of fresh scallions and cilantro flakes for that final vibrant pop.
Expert Tips for Success from a Professional Kitchen
- Rinse Your Rice: Always rinse jasmine rice under cold water until it runs clear before cooking. This removes excess starch, which is the primary cause of “mushy” fried rice.
- The “Day-Old” Rule: Fresh rice is too moist. If you must make it the same day, spread the cooked rice on a baking sheet and place it in the freezer for 15 minutes to dehydrate the surface.
- Don’t Overcrowd: If your wok isn’t large enough, sear the chicken in two batches. Overcrowding leads to steaming rather than searing, and you’ll miss out on those beautiful charred edges.
- Use Neutral Oil: Avoid using extra virgin olive oil for this dish; its smoke point is too low. Stick to avocado, peanut, or grapeseed oil for the best results.
Storage, Reheating, and Freezing Advice
This teriyaki chicken fried rice is excellent for meal prep. Store leftovers in an airtight container in the refrigerator for up to 4 days. When reheating, add a teaspoon (5ml) of water to the bowl and cover it to create steam, which helps soften the rice grains in the microwave.
For freezing, allow the rice to cool completely. Store in freezer-safe bags for up to 3 months. Thaw overnight in the fridge before reheating in a hot pan with a little bit of fresh oil to restore the “fried” texture.
What to Serve with This Teriyaki Masterpiece
While this dish is a complete meal on its own, it pairs beautifully with other globally-inspired dishes. If you are looking for a lighter side, a simple cucumber salad with chermoula dressing can provide a bright, acidic contrast to the sweet honey-teriyaki glaze.
If you’re hosting a larger dinner party, consider serving these alongside bang bang chicken bowls for a variety of Asian-inspired flavors, or even some Greek potatoes if you want to offer a fusion-style feast with different starch options.
Frequently Asked Questions
Yes! Simply substitute the soy sauce with tamari or liquid aminos and ensure your mirin is certified gluten-free.
It is not recommended. Fresh rice contains too much moisture, which will make the dish mushy. If you must use fresh rice, spread it on a tray and freeze for 15 minutes to dry it out.
The secret is the honey in the teriyaki reduction. Adding the glaze at the very end of the searing process allows the sugars to caramelize and coat the chicken in a thick, dark amber sheen.
Use a neutral oil with a high smoke point, such as grapeseed, avocado, or vegetable oil. Avoid olive oil or butter, as they will burn at the high temperatures required for a proper sear.
Jasmine rice is a long-grain variety that stays relatively firm and individual when fried. Short-grain rice is starchier and tends to stick together, which is better for sushi but less ideal for fried rice.
The Ultimate Teriyaki Chicken Fried Rice Recipe Card
Teriyaki Chicken Fried Rice with Honey-Glazed Seared Chicken
Ingredients
Equipment
Method
- Simmer soy sauce, honey, mirin, and ginger in a saucepan until thickened into a dark amber glaze.
- Cook beaten eggs into a thin sheet in the wok, then roll and slice into ribbons.
- Sear chicken chunks on high heat until charred; toss with half the glaze until glistening.
- Char onions, carrots, and peas in the wok with aromatics.
- Add rice and remaining reduction, tossing until grains are golden-brown and steaming.
Notes
Ensure the wok is smoking hot before adding chicken for those charred edges.
Closing & Call to Action
Bringing restaurant-quality teriyaki chicken fried rice into your home kitchen is all about mastering the heat and the glaze. The combination of succulent honey-coated chicken and the aromatic soy-ginger rice creates a sensory experience that is hard to beat. If you enjoyed this recipe, please leave a comment below and tell me how your “charred edges” turned out!
Don’t forget to sign up for our newsletter for more elite recipe developers’ secrets. You can also save this recipe to your “Dinner Goals” board on Pinterest so you never lose it!